
Teachers can set their own exams using the Trelson (previously ChromEx) platform for their students to access on a Chromebook.
There are some great benefits to using Trelson:
- You can set it up yourself to be run in your lesson, no need to ask MIS to set anything up
- Chromebooks are ‘locked’ so students can’t access the internet
- Students can log in with their normal details so no need to remember an extra login
- At the end of the exam, the work is instantly saved into the Google Drive of the teacher who set up the exam
Setting up an exam
Teachers can just head to this link and log in with their college Google account to get started – https://assessment.trelson.com/#/exams
Full instructions on Trelson can also be found in this presentation.
Note – The video below hasn’t been updated since Trelson was rebranded from ChromEx but the method remains the same. Just the colours and branding may differ.
How does a student take the exam?
A student just needs to select ChromEx in the bottom left of the Chromebook BEFORE logging in.
Then when they are asked to log in to the ChromEx platform, the just need to use their normal college Google credentials.

Google Jamboard is a digital whiteboard app that allows you to collaborate with others and join together your ideas.


Jamboard is Google’s answer to an Interactive Whiteboard, originally designed and marketed with a portable 55-inch, 4k display. Google have since released Android and iOS apps for it, perfect for touchscreen Chromebooks here at Barton! Even if you don’t have a touchscreen device you can still connect to a Jam on your web browser at jamboard.google.com
It is connected to G Suite so you can log in with your College credentials as normal giving you the ability to present, edit and share files with Google services like Drive, Sheets, and Slides.
Read more
The Google Classroom Android App is the best companion app for the Google Classroom system.
Read more

WeVideo – Make videos on any device, anywhere.
WeVideo is a cloud-based video editor that enables you create pro like videos on any device, including Chromebook, Windows, Mac, and Mobile. Cloud-based storage means there is no software to download and install, with the added flexibility of accessing your projects on any device. Get advanced with features like green screen to take your videos to the next level. Once you’ve finished your video, export in multiple formats and save directly to your Google Drive.
Sign-up
Sign-up and sign-in to WeVideo using your college Google account. This will make it easy to sign-in across all your devices and save your projects on Google Drive.
Let’s get started
To get started, select the type of project you’d like to create:
- Video – Start a new video project;
- Recording – Record your screen and webcam;
- GIF – Create an animated GIF to embed in a presentation, website, or share on social media.
Import media
You can upload video and images directly from your device or add media stored on your Google Drive. After adding your media, simply drag it onto the timeline. WeVideo also includes a huge library of stock media footage.
Add transitions
To add a new transitions, click on the Transitions tab and drag the transition onto the timeline. Preview each transition by hovering your mouse over it and clicking Play.
Add audio
Add music and sound effects to your video. Browse the audio available in WeVideo or upload your own.
Add animated text
Use text for a title screen, credits, or label elements in your video project. Go to the text tab and then drag the text element onto the timeline. Afterwards, double click the text on the timeline to edit it.

Export and share your video
Exporting your video to share with the world is quick and easy. Press the finish button, name your project, select the appropriate resolution and press export. You can even ask WeVideo to save the export straight to your Google Drive.
WeVideo Academy
To learn more about WeVideo and discover how to creatively use video creation projects in the classroom go and explore the training available at the WeVideo Acadmey.
The college has signed up for a ClickView subscription which provides access to a huge range of TV shows, movies and video content for students and staff to use.
It gives access to TV shows that have been on TV in the past couple of weeks but it does also allow you to request TV shows and movies too. Providing ClickView can access them, they will make it available and send you a link to access it. Just as an example, you can (at the time of writing) watch this morning’s episode of Newsround from CBBC, watch all episodes of Frozen Planet, or the 2020 Sonic the Hedgehog film.
You can log in with your college Google account at this link – https://online.clickview.co.uk
At Barton Peveril, we use a variety of technologies to make courses more engaging and improve access to learning for students. Online learning technologies like Google Classroom have brought exciting opportunities to reconsider how we teach, engage with or involve learners in different ways.
In this guide, we will look at some of the online learning technologies we have available that can be taken advantage of for distance learning in the event of a college closure due to Covid-19.
Live Online Lessons
Google Hangouts Meet is Google’s video conferencing tool that enables you to talk face to face with learners and engage with your class remotely. All your students need is Wi-Fi access and a device such as a laptop, smartphone or tablet.
Lesson content can be shared in a live video stream with groups ranging from a few people up to hundreds. Hangouts Meet includes the ability to share your screen, ideal for displaying a presentation or other content with the class.
Google has recently made it possible to record a lesson hosted in Hangouts Meet as a video in your Google Drive. All lessons must be recorded, and if you wish these recordings can be shared in Google Classroom afterwards for students who couldn’t make it.
To improve the remote learning experience for teachers and students using Hangouts Meet, Google have made several improvements:
- Only meeting creators can mute or remote other participants in a meeting;
- Students cannot start/stop a meeting being recorded.
Learn more about Google Hangouts Meet >>
Assignments and Feedback
Google Classroom is a well-established online learning tool at Barton Peveril that you can use to keep students engaged while they’re at home. For instance, start a virtual class discussion to explore lesson content and talk about what they’re learning. You can also give students feedback about their work in Classroom when marking an assignment.
Tracking student understanding and progress can be achieved through combining Classroom with Google Forms. Quizzes in Forms offer automatic marking and enable you to embed content such as images and videos. When you share a Google Forms quiz using Classroom, you can easily assign it as an automatically marked assignment.
Learn more about Google Classroom >>
Recorded Lessons
Screencastify allows you to record your screen, perfect for creating recorded lessons for a flipped classroom or distance learning. It is available as an extension in Google Chrome that can be used from a Chromebook, PC, or Mac. In addition to recording your screen, it combines annotation tools, adds a voice over with your microphone, while also including a picture-in-picture overlay of your webcam. Everything you record is saved to Google Drive so you can easily share the video with students in Google Classroom.
Screencastify is giving educators a premium upgrade to increase from the 5 minute limit in the free version. Go to account.screencastify.com/user/subscribe and use “redeem coupon” with the code CAST_COVID.
Learn more about Screencastify >>
Distance Learning Resources
Useful resources we’ve found from across the internet:
- myBarton Digital Learning Hub – Apps for teachers recommended by teachers that are great for distance learning.
- Remote Teaching with Google Classroom and Hangouts Meet – 15 minute video giving an overview of using Google Classroom and Hangouts Meet for remote teaching.
- Hangouts Meet Guide for Remote Learning – 10 minute video with some key Hangouts Meet tips and tricks for remote learning.
- Google Teach from Anywhere – Lessons to teach digital skills to engage students outside the classroom.
- Online Teaching in the time of Coronavirus – Article discussing synchronous and asynchronous digital tools for online learning.
Access to premium versions of educational apps made free during the Covid-19 school closures:

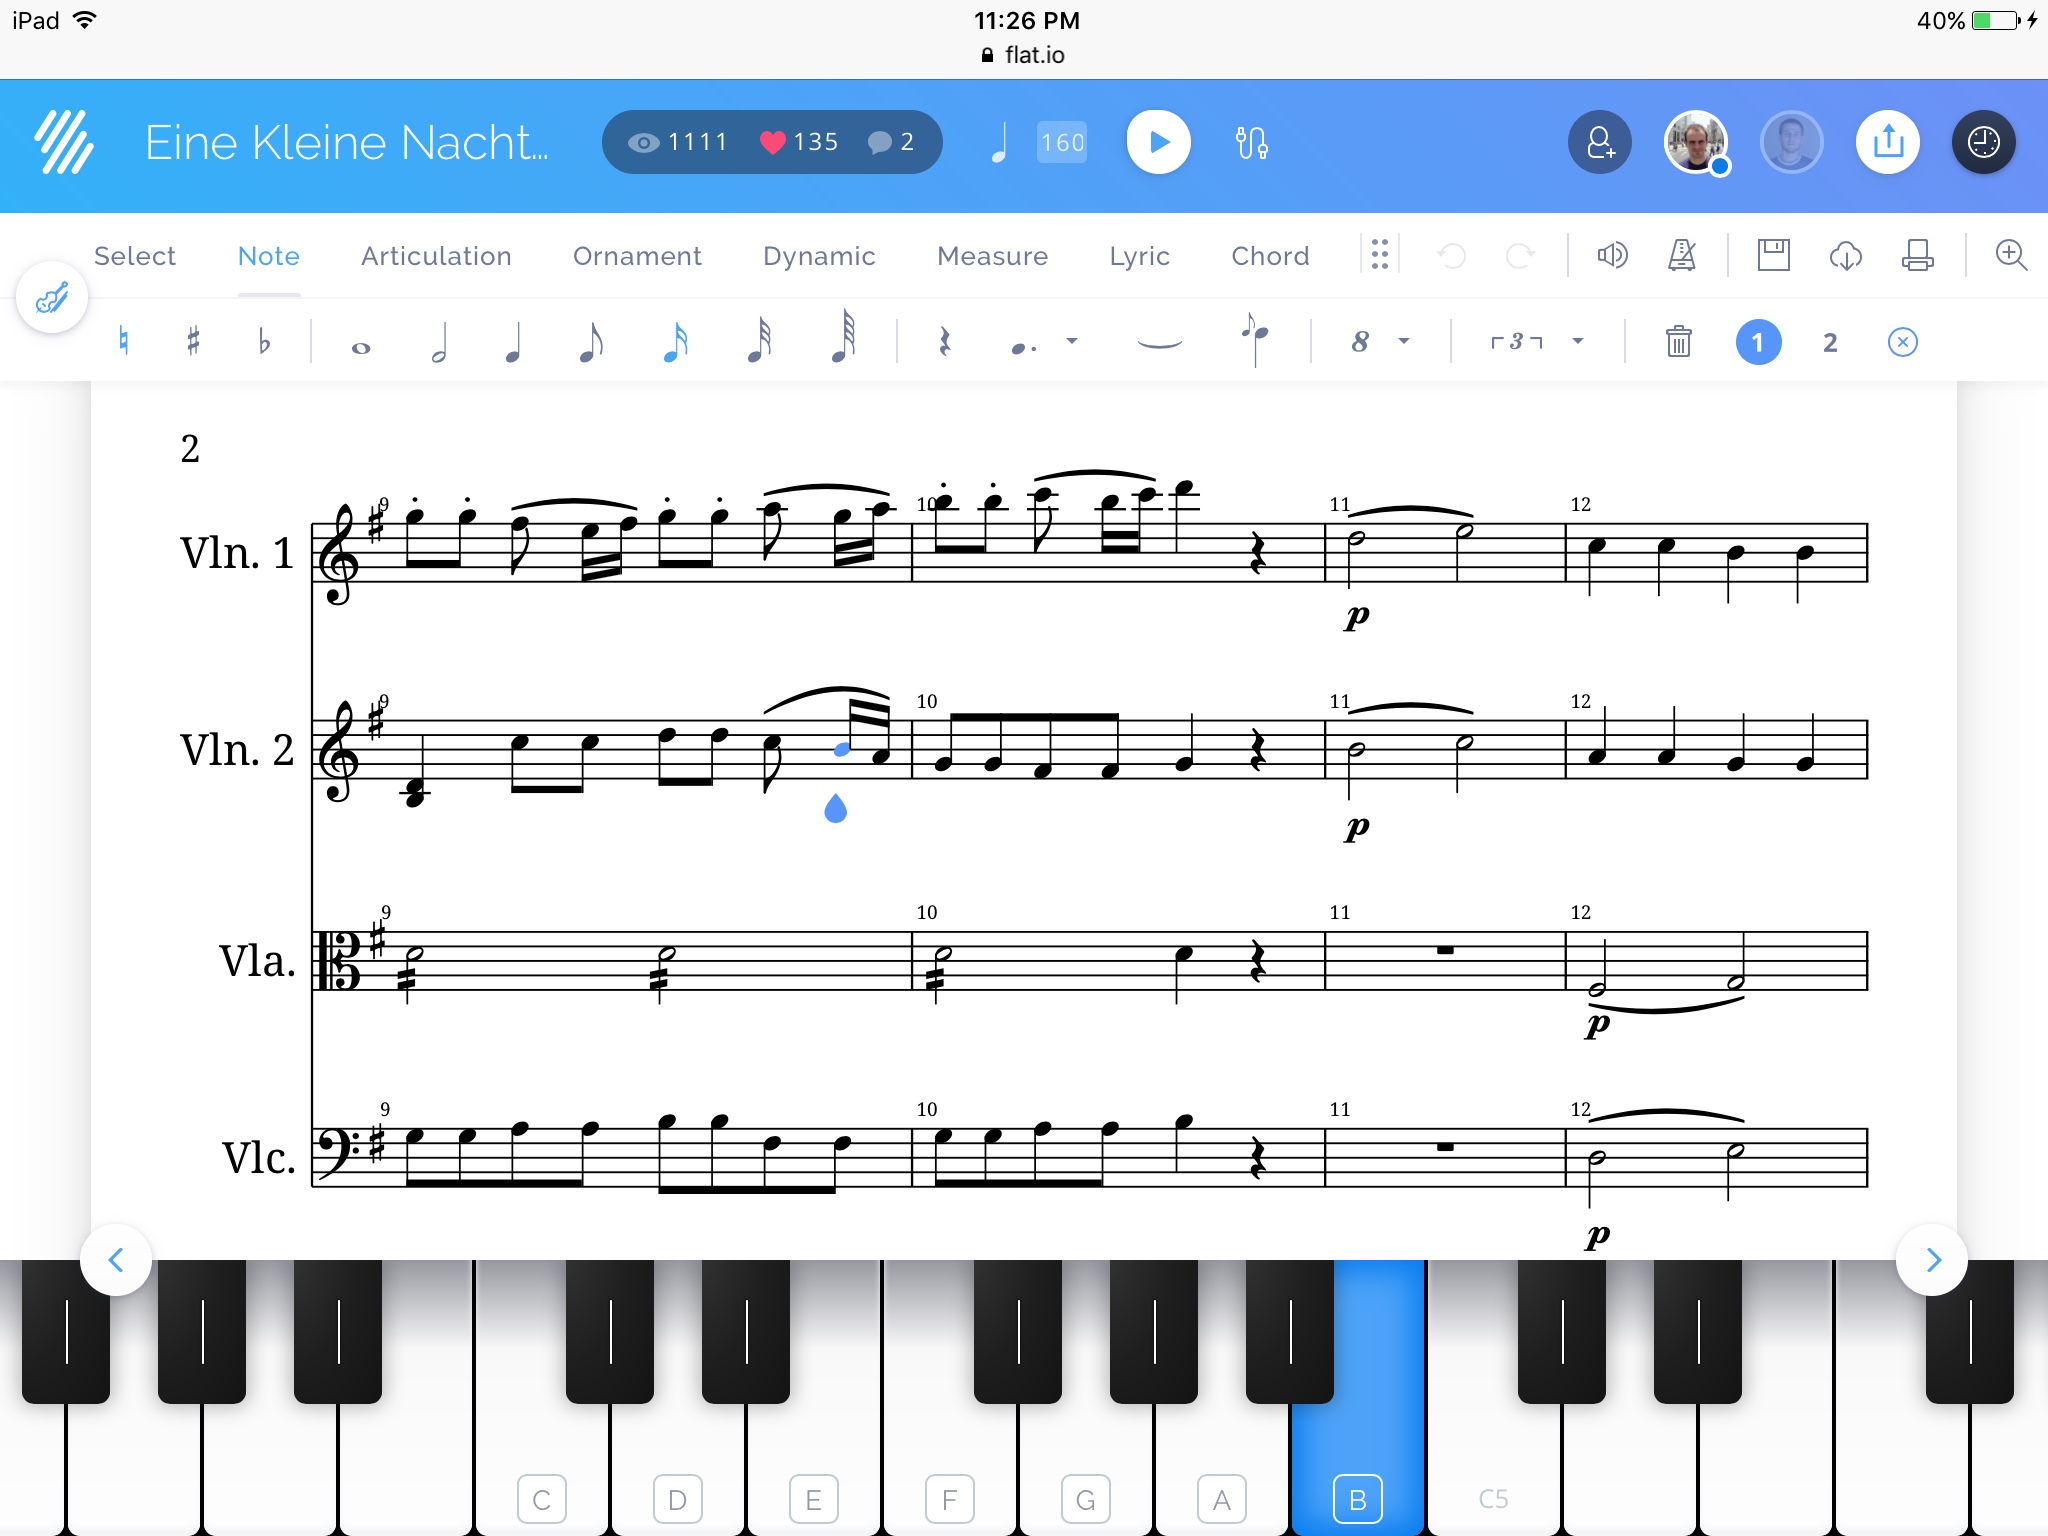
Flat IO – Write your music scores online with the easiest tool for creating sheet music together.
User friendly online music notation software that gives you all the tools that you need to make your own sheet music. You can write, listen, share and discover music scores right in your web browser on any device.
Invite your friends to compose your music scores online collaboratively. A single musical composition can be opened and edited in real time by multiple people using different devices at the same time.
- Your music notation editor online in your web browser
- Real-time collaboration and offline edition if you lose your internet connection
- Compose with your MIDI devices: plug your device and play!
- MusicXML, MIDI, PDF and Audio (MP3 and WAV) compatibility
- Read and write music notation and guitar tablatures, together
- Smart History: Browse all the modifications you made, note after note
- Collaborate with video within Google Hangouts
- Percussion instruments and notation to create amazing drum scores
- Online digital and visual metronome to help you to practice easily
For teachers there is an Education version available. Flat for Education is designed for your music classroom. You can use it on any device to access and create your musical compositions or music education activities. Flat has a unique collaborative experience: let your students work in real-time on the same sheet music, whether you are in the classroom or working from home. It can also integrate with Google Classroom to make it easier with your classes.
Examples
You can see all the most popular creations on Flat.IO on their ‘Popular‘ page. We’ve added a few examples below:
Lil Nas X – Old Town Road made on Flat.IO using a Classical Guitar, Horn in C, Clarinet, Grand Piano and a Tuba.
The Ghostbusters Theme Song with a Grand Piano and a Drumset.
The Shaun the Sheep Theme Song made on Flat.IO using 2 Banjo’s and a Tin Whistle.
Camila Cabello – Havana made on Flat.IO using just a Grand Piano.
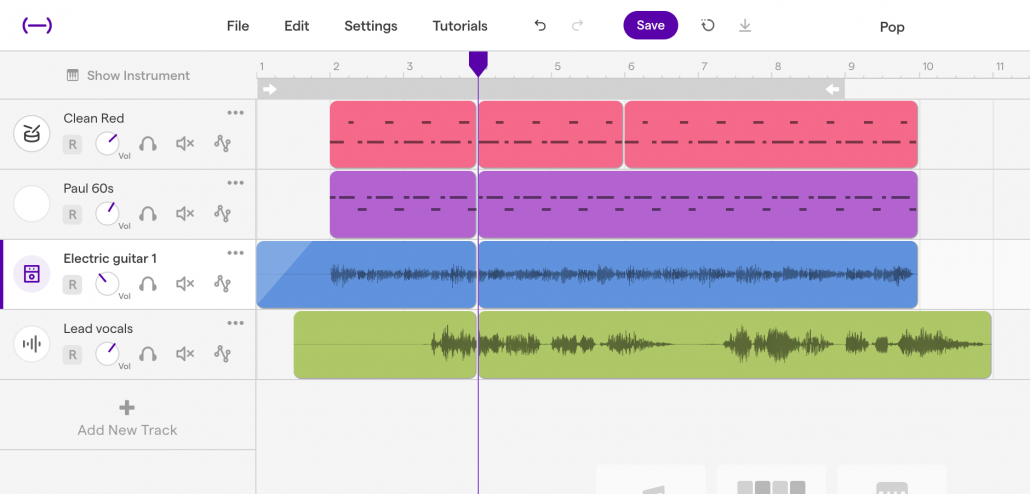
Soundtrap let’s you record instruments, vocals and use loops to make music anywhere.
Soundtrap for Education is a cloud-based platform that enables students to create music or podcasts. With Soundtrap, students can collaborate on projects using an extensive collection of quality loops, effects, and software instruments from anywhere in the world pretty much on any device. It also integrates with Google Classroom for effortless collaboration.
It’s worth noting that Students can’t sign up for this without a teacher already signing up beforehand. There is a free trial available for teachers and after that there is reduced pricing available for education.
For example, start a new song using all the built in professional loops and software instruments on your tablet when on the bus, continue on your Chromebook when arriving at home, invite a couple of friends, who are working on Mac and Windows devices, and conduct a video chat from within the studio coming up with the bass line for the song and finally find a didgeridoo player in the Soundtrap community laying down a unique ending of the song; you are all working in the same project seeing and hearing all the changes. It’s like Google Docs, but for music production!
See how teachers are using Soundtrap across subjects:
- Business – Create a radio commercial for a product
- Math – Learn fractions with musical notes
- Science – Memorize the periodic table with music
- Music – Create your own ringtone
- World Language – Learn a new language by creating a podcast
- English – Record your own speaking to improve fluency
Steps for Getting Started with Soundtrap
Step 1: Create a free school trial account at www.soundtrap.com/edu
- Select ‘Start as a Teacher’ to set up your trial account
- All new trial accounts will get free access to Soundtrap for Education until the end of the term/semester (during the COVID-19 closures)
- All trial accounts will be given 500 seats by default
Step 2: Invite others or roster students with one of the following methods:
- Google Classroom integration, click here for instructions
- Invite by group code, click here for instructions
Congratulations! You have registered your users on Soundtrap!
Step 3: Start incorporating Soundtrap into your classes!
- Soundtrap lesson plans that are adaptable for distance learning
- (Remember, Soundtrap is not just for musicians – ideas for integrating Soundtrap into ALL content areas here)
- Supporting curriculum for creating podcasts with your class
- Rubrics for Assessing Audio: Podcasting Rubrics, Music-Making Rubrics, and others!
- Other distance learning resources from partners doing great things with Soundtrap:
Step 4: The following are essential skills to review:
- Create and manage student accounts
- Collaboration features
- Create a quick, easy project with a few tracks/loop library
- Create an assignment
Step 5: Support and Community
- Please check out our support portal. Most solutions can be found there before contacting support!
- Join our Soundtrap Community and contribute to the conversation
Blogger is Google’s free blogging service, probably the most famous blog service in the world. Whether you’d like to share your knowledge, experiences or the latest news, create a unique and beautiful blog for free.
It’s so simple to get started with Blogger, follow the steps below to start your first blog. Before you do get started though, it’s worth noting that Blogger will only work in Chrome, Firefox, Opera or Safari browsers so if you’re using Internet Explorer or Microsoft Edge, you’ll need to get yourself one of the other browsers listed here. Also, your blog can either be Public for anyone in the world to see or Private where you can limit it to a maximum of 100 people to view it. If you want more than 100 people to be able to view it but don’t want it to be public to the world, it might be best creating a Google Site and adapting it into a blog instead.
If you are creating a blog for a personal reason, it might be best to create it using a personal Google account as you may lose access to your blog when you leave Barton.
Creating your Blog
- Sign in using a Google account.
- On the left, click the Down arrow .
- Click New blog.
- Enter a name for your blog.
- Choose a blog address, or URL.
- This can be anything you want it to be, as long as no one has used that same URL before.
- Choose a template.
- Click Create blog.
That’s your blog created and ready for content!
Blog Theme
A plain blog might look a bit boring, there are a couple of ways you can change the design of your blog to make it look a bit better. Blogger provides a range of pre-made template themes for you to choose from. Follow the steps below to take a look:
- In the left menu, click Theme.
- Click the theme you want to use.
- Just below the theme, click Apply to Blog.
Now you’ve picked the theme, you can customize it further by simply selecting the Customize option at the top of the page. From here you can change the background, colours, sizings and all sorts of settings. Once happy, click Apply to Blog in the top right corner, to make your changes live. Click Back to Blogger to go back to the homepage.
Layout & Gadgets
The layout of your blog might be something you want to change once you’ve got a bit more content on your blog, it can be hard to decide on a layout before you start adding content.
Gadgets are extra little bits to add to your blog, you can add lists, individual images, links to Wikipedia articles and more!
To start with both Layouts & Gadgets, just click the Layout menu on the left hand side.
In here you can move the different areas around and find a layout that works best for you. To add a gadget to a certain location click the Add Gadget button and then take a look through the list to find one you want.
Pages
You can add pages to keep information separate, such as an ‘About’ page or a ‘Contact’ page. There is no limit to the number of pages you can have on one blog. Before they will show on your Blog, you will need to add the Pages Gadget to allow users to navigate around the blog. Follow the steps below to add the Pages Gadget:
- In the left menu, click Layout.
- In the section you want your pages to show, click Add a Gadget.
- In the window, next to “Pages”, click Add .
- Set your settings and click Save.
- At the top right, click Save arrangement.
Adding, editing or removing a page
In the left menu, click Pages.
- Create a new page: Click New page. Enter a page title and other information and click Save, Preview, or Publish.
- Edit a page: Under the page you want to edit, click Edit. Update your page and click Save, Preview, or Publish.
- Delete a page: Under the page you want to remove, click Delete then Ok.
Link to external site
You can get a link on the Pages Gadget to link an external site, such as a YouTube channel or other website.
- In the left menu, click Layout.
- In the “Pages” section, click Edit .
- Under “Pages to show,” click + Add external link.
- Enter the page title and URL and click Save Link.
Select the pages to show
- In the left menu, click Layout.
- In the “Pages” section, click Edit .
- Select the pages you wish to show.
- Click Save.
- At the top right, click Save arrangement.
Posts & Content
Write a new post
- Click New Post.
- Create the post.
- Optional: To see how your post will look, click Preview.
- To save your post without publishing it, click Save. To publish your post, click Publish.
Labels
Labels can help you organize your posts to make it easier to find posts of a similar subject. You can create a label for anything, such as a month or year or just any word.
- You can add more than one label to a post.
- In your dashboard, you can find your labels next to the title.
- Your readers can find your labels in your posts and use them to filter your content.
Add labels to your posts (Optional)
- To open the editor view, click an existing post or click New post.
- On the right, click Labels.
- Enter a label or click an existing label.
Filter your posts by label
- In the upper right, click the label dropdown .
- Click a label.
Adding Images & Video to a post
Adding an image
- Create a new post or edit a post to add images.
- On the Post Editor, click Insert image .
- Choose where you’d like to upload the image from.
- Choose one or more images to upload.
- Click Add selected.
- When the image is in your post, click it to change the size, caption, or alignment on the page.
Stop images from opening in an overlay
By default, images on your blog will be opened in a large overlay, called a Lightbox. To prevent images from opening in the Lightbox:
- In the left menu, select Settings Posts, comments and sharing.
- Under “Posts,” find “Showcase images with Lightbox” and select No.
Adding a Video
- Create a new post or edit a post to add a video.
- On the Post Editor, click Insert a video .
- Choose the video you want to use.
- Click the From YouTube tab to search YouTube for a video or paste a YouTube link in.
Access to your blog
You can control who can edit your blog, and who can read it. It’s worth noting that your blog can either be Public for anyone in the world to see or Private where you can limit it to a maximum of 100 people to view it. If you want more than 100 people to be able to view it but don’t want it to be public to the world, it might be best creating a Google Site and adapting it into a blog instead.
Let others edit your blog
- In the left menu, click Settings Basic.
- Under “Permissions,” find “Blog Authors” and click Add authors.
- Enter the email address of the person you want to add.
- Click Invite authors.
Who can see your blog
- In the left menu, click Settings Basic.
- Under “Permissions,” find “Blog Readers” and click Edit.
- Select Public, Private – Only blog authors, or Private – Only these readers.
- Click Save changes.
After they accept the invitation, they’ll be listed as an author. You can add up to 100 total members (authors, administrators, or readers) to your blog.