The Google Classroom Android App is the best companion app for the Google Classroom system.

Read more
The Google Classroom Android App is the best companion app for the Google Classroom system.
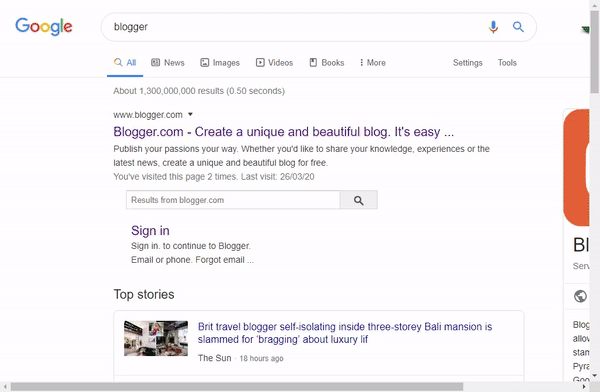
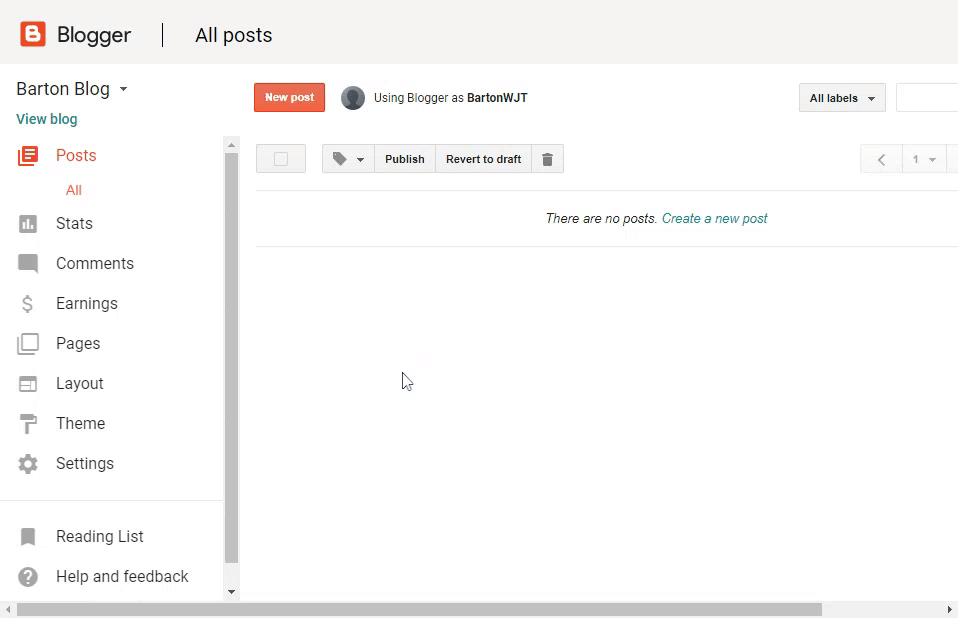
Blogger is Google’s free blogging service, probably the most famous blog service in the world. Whether you’d like to share your knowledge, experiences or the latest news, create a unique and beautiful blog for free.
It’s so simple to get started with Blogger, follow the steps below to start your first blog. Before you do get started though, it’s worth noting that Blogger will only work in Chrome, Firefox, Opera or Safari browsers so if you’re using Internet Explorer or Microsoft Edge, you’ll need to get yourself one of the other browsers listed here. Also, your blog can either be Public for anyone in the world to see or Private where you can limit it to a maximum of 100 people to view it. If you want more than 100 people to be able to view it but don’t want it to be public to the world, it might be best creating a Google Site and adapting it into a blog instead.
If you are creating a blog for a personal reason, it might be best to create it using a personal Google account as you may lose access to your blog when you leave Barton.
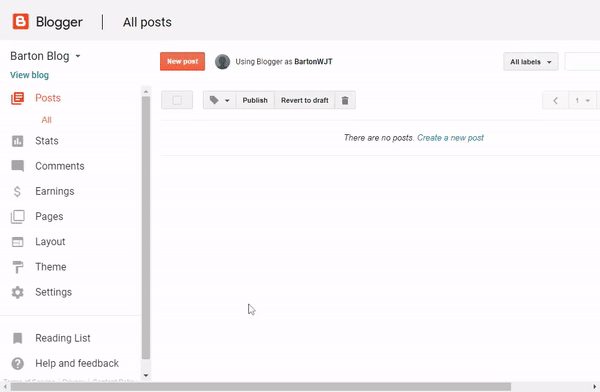
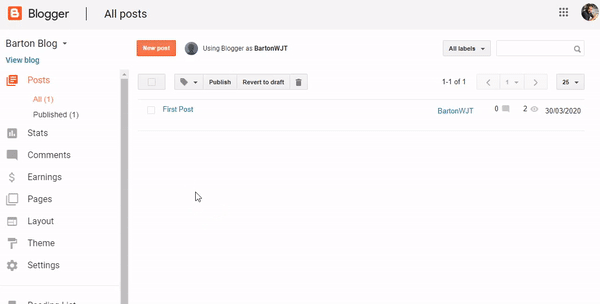
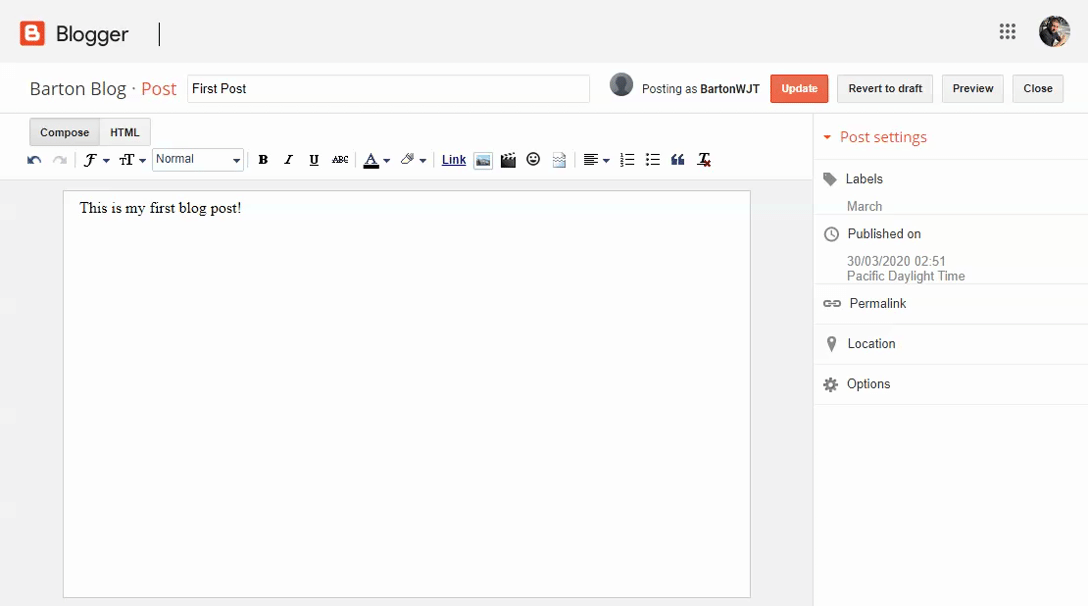
That’s your blog created and ready for content!
A plain blog might look a bit boring, there are a couple of ways you can change the design of your blog to make it look a bit better. Blogger provides a range of pre-made template themes for you to choose from. Follow the steps below to take a look:
Now you’ve picked the theme, you can customize it further by simply selecting the Customize option at the top of the page. From here you can change the background, colours, sizings and all sorts of settings. Once happy, click Apply to Blog in the top right corner, to make your changes live. Click Back to Blogger to go back to the homepage.
The layout of your blog might be something you want to change once you’ve got a bit more content on your blog, it can be hard to decide on a layout before you start adding content.
Gadgets are extra little bits to add to your blog, you can add lists, individual images, links to Wikipedia articles and more!
To start with both Layouts & Gadgets, just click the Layout menu on the left hand side.
In here you can move the different areas around and find a layout that works best for you. To add a gadget to a certain location click the Add Gadget button and then take a look through the list to find one you want.
You can add pages to keep information separate, such as an ‘About’ page or a ‘Contact’ page. There is no limit to the number of pages you can have on one blog. Before they will show on your Blog, you will need to add the Pages Gadget to allow users to navigate around the blog. Follow the steps below to add the Pages Gadget:
In the left menu, click Pages.
You can get a link on the Pages Gadget to link an external site, such as a YouTube channel or other website.
Labels can help you organize your posts to make it easier to find posts of a similar subject. You can create a label for anything, such as a month or year or just any word.
By default, images on your blog will be opened in a large overlay, called a Lightbox. To prevent images from opening in the Lightbox:
You can control who can edit your blog, and who can read it. It’s worth noting that your blog can either be Public for anyone in the world to see or Private where you can limit it to a maximum of 100 people to view it. If you want more than 100 people to be able to view it but don’t want it to be public to the world, it might be best creating a Google Site and adapting it into a blog instead.
After they accept the invitation, they’ll be listed as an author. You can add up to 100 total members (authors, administrators, or readers) to your blog.
Hangouts Meet is Google’s video conferencing tool that also allows you to share your screen with attendees.

Hangouts Meet is Google’s video conferencing tool that enables you to take part in an online lesson. Lesson content can be shared with you in a live video stream as if you were in a physical classroom. You can use it on the web at meet.google.com, on your Android device and on iOS devices.

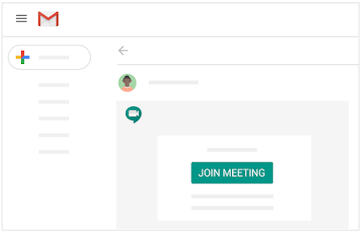
Joining a video meeting can be done in a number of different ways depending on how it’s been set up. But most likely you’ll just need to check your lesson in Google Classroom where your teacher will put a link for the video meeting, if you simply click that link you will be taken straight in to the digital lesson.
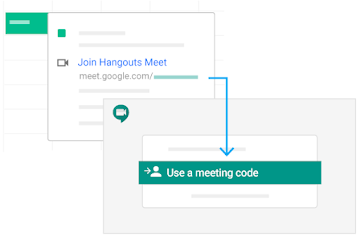
If your teacher has created a video meeting in a different way, there are other ways to join. You can click the link in your calendar appointment, or your meeting text or email. You can type in the meeting code on the Hangouts Web website or even dial in to the meeting on a physical phone so you can still hear what is being said if you don’t have access to a computer.

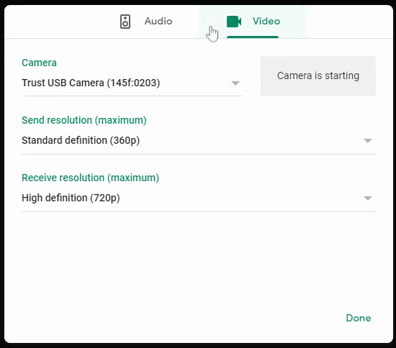
Meet will pick up your default camera, speaker and microphone which in most cases will be the only ones you have however if you plug in alternative devices to use instead, it should then automatically pick these up instead of any built-in device.
More information can be found here and steps for changing the settings within the mobile apps can be found here.
Hangouts Meet is Google’s video conferencing tool that also allows you to share your screen with attendees.
Hangouts Meet is Google’s video conferencing tool that enables you to to talk face to face and share your screen with others. Lesson content can be shared in a live video stream with groups ranging from a few people up to hundreds of users. You can use it on the web at meet.google.com, on your Android device and on iOS devices. You can either just jump straight into a Video Meeting or schedule one for a later date and time in Google Calendar.
One of the best features of Hangouts Meet is it’s ability to provide live captions/subtitles which can be turned on by anyone who needs it.
We’ve written up a quick run through of Hangouts Meet and how to get started below.
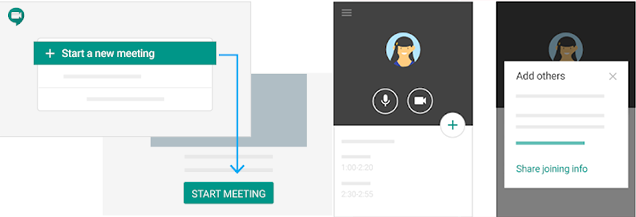
You can start a new session by opening Hangouts Meet in the web or in the app and clicking Start a new meeting or pressing the Plus + icon.
In both methods, once you’ve set up the meeting, you’ll then be offered the chance to invite people to join you.
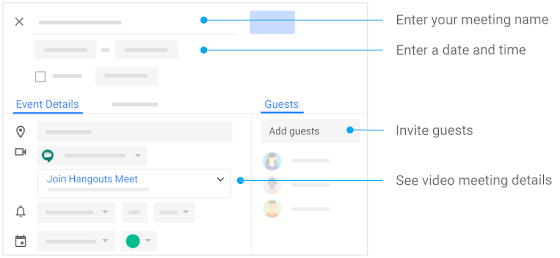
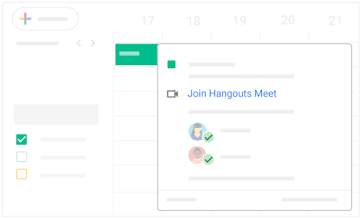
To schedule a meeting for the future, simply head to Calendar and create an event then click on Add Conferencing and it will automatically create a Hangouts Meet session ready for the set date and time.
You can then invite guests to the event and they’ll all receive the information to join the video call.
Joining a video meeting can be done in a number of different ways depending on how it’s been set up. You can click the link in your calendar appointment, or your meeting text or email. You can type in the meeting code on the Hangouts Web website or even dial in to the meeting on a physical phone.
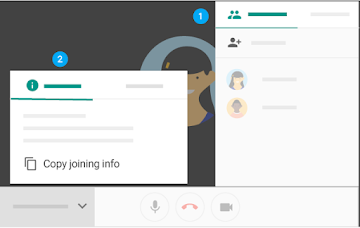
If you need to add more people to a meeting after the initial setup that is easy to do using one of two methods.
Option 1 – Click the People tab in the top right then Add People and enter their email addresses.
Option 2 – Click the meeting name in the bottom left corner of the screen and copy the joining info so you can then paste that in to your own email to whoever you want.
You can find more information here including how to remove people.
Meet will pick up your default camera, speaker and microphone which in most cases will be the only ones you have however if you plug in alternative devices to use instead, it should then automatically pick these up instead of any built-in device.
More information can be found here and steps for changing the settings within the mobile apps can be found here.
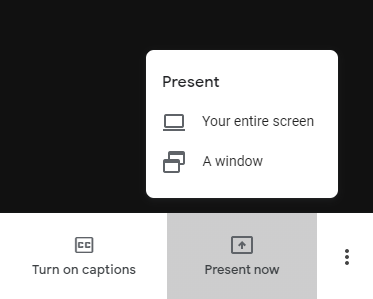
Sharing or ‘Presenting’ your screen is possible on computers and iOS devices but not currently supported on Android devices. On the computer you can opt to share your whole screen or just an individual window whereas on the iOS device you can only share your whole screen.
To present on your computer just look for the Present now button in the bottom right of the meeting window then select if you want to share your entire screen or a window. Sharing just a window will allow you to share just a presentation or document whilst allowing you to continue working on your computer.
More information including how to take over presenting from someone else can be found here.
Google Classroom is an online learning platform for schools and colleges that aims to simplify creating, distributing and marking assignments in a paperless way. Google Classroom is designed to help students and teachers communicate, collaborate, organise and manage assignments, go paperless, and much more! Classroom also seamlessly integrates with other Google tools like Google Docs and Drive.
Improved Communication – Teachers can create assignments, send announcements, and instantly start class discussions. Students can share resources with each other and interact in the class stream or by email. Teachers can also quickly see who has or hasn’t completed the work, and give direct, real-time feedback and grades.
Better Organisation – Students can see assignments on the To-do page, in the class stream, or on the class calendar. All class materials are automatically filed into Google Drive folders.
Read more
Workbench hosts a huge range of features. Whether you’re looking for some pre-made lessons on a specific topic or want to find some basic tasks for your lesson, you might want to track your student progress visually or learn code yourself there is a wealth of content across the site. Plus, it’s free for education!
Read more
With Google Sites, you can quickly create a website to gather a variety of information in one place – including videos, calendars, presentations, attachments, and text – and easily share it for viewing with your class, course or the entire college.
Creating a web page using Google Sites is as simple as writing a document, and you can easily embed Google Docs, Slides and YouTube videos to develop interactive websites.
You can access the new Google Sites by logging into Google Sites and then select “Create”.
Read more
Socratic is a Google app where you can simply take a photo of a problem and get an instant explanation and step-by-step solutions.
It’s easy to give it a try, download the app and take a photo of one of the questions below:
How long will it take a 1500 W motor to lift a 300 kg piano to a sixth-story window 20 m above?
What are the differences between active and passive transport?
In the reaction of lead nitrate with magnesium chloride, what is the spectator ion?
An electric device delivers a current of 5.0 A for 10 seconds. How many electrons flow through this device?
√3x−13=5
−12x+9y=73x−4y=2
State the possible rational zeros for the function f(x)=3×3+11×2+5x−3
Find the distance between points ( -3 , 7 ) and ( 4 , 1 ).
What does the green light symbolize at the end of the book?
Who is Anne Hutchinson? How does Hawthorne feel about her?
Why does Elisa begin to trust the stranger and invite him into her garden?
What does Crusoe’s second trip to Guinea reveal about his character?
What was one purpose of the Marshall Plan of 1948?
Who was Elizabeth Cady Stanton?
Why was 1968 a year of turmoil in US history?
What part did Washington play in the French and Indian War?
With Android Live Transcribe you can see words appear on your Android phone as they’re spoken. You can also reply just by typing your message on the phone. It also works to show you how loud your environment is to ensure it is able to pick you up sufficiently. It also supports external microphones through headsets to allow you to speak hands free.

Android Sound Amplifier enhances audio from your Android device using headphones to provide a more natural listening experience. It helps to filter, augment and amplify the sounds in your environment, even allowing you to carry on conversations just by adjusting the sound levels to boost quiet sounds and reduce the loud noises.