Record, trim, share, and viewtranscribed screencasts with the new Screencast app on Chrome OS.
Make video creation capabilities available to everyone in your class with the Screencast app built into Chrome OS. Educators can record, trim, transcribe and share lessons or demos to build a custom library of recordings. Students can create their own screencasts to share their ideas and what they’ve learned, or access lessons if they missed a class or need homework help. You can even draw or write on the screen using a touchscreen or stylus to diagram or illustrate key concepts. Recordings are stored on Google Drive, and can be accessed via link to the Screencast app – at college or from home. The new Screencast app will be available on Chrome OS M103.
https://my.barton.ac.uk/digital/wp-content/uploads/sites/4/2021/10/Google-Chromebook.png332712Peter Hornerhttps://my.barton.ac.uk/wp-content/uploads/2018/06/LOGO-BP-COLOUR-1030x273.jpgPeter Horner2022-06-20 12:21:572022-06-20 12:24:05Screencast on Chromebooks
We wanted to remind everyone about the importance of keeping your Chromebook up to date. Generally, keeping any device up to date is for the best. Whether it’s your Apple Mac, Windows Laptop, or Smartphone, updating your devices ensures you get the most up-to-date security patches and any of the latest features. Keeping your devices up to date helps to keep your data safe.
Before the half term, we saw a rise in classroom issues with Chromebooks, such as projectors not displaying what’s on the screen or the speakers not playing sound from Chromebooks. 9 times out of 10 these issues were resolved by running a quick update on the Chromebook. Whilst it can be a little frustrating that Google release updates so often, every week or two, it is important that you run them. The vast majority of the time the update will automatically download to your Chromebook as soon as it’s available, you will then have a notification telling you to restart to update.
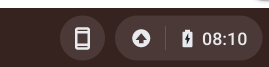
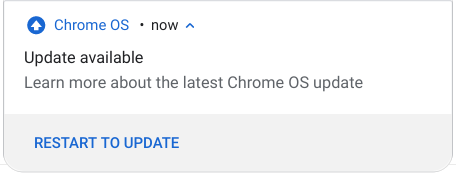
You can see in the screenshot example above, it’s nice and easy to see that you’ve got an update. Just look for the little arrow in the circle to the left of the time. Just click on that, or the time, to access your notifications and the update will always be the first one visible in the list. Just click Restart to Update, it may take a couple of minutes to restart your Chromebook and apply the update but not only are you getting the latest security patches, you’re also avoiding any delays with the start of your lessons.
If something isn’t working as expected on your Chromebook, in the first case it’s best to check for an update before anything else. Even if there isn’t an update available it would be a good idea to at least restart your Chromebook.
You can check for updates yourself by clicking on the time, click the Settings cog, click About Chrome OS and then click Check for Updates.
https://my.barton.ac.uk/digital/wp-content/uploads/sites/4/2021/10/Google-Chromebook.png332712Will Taylorhttps://my.barton.ac.uk/wp-content/uploads/2018/06/LOGO-BP-COLOUR-1030x273.jpgWill Taylor2021-10-27 11:35:492021-10-27 11:35:49Reminder: Updating your Chromebook
A couple of days ago Adobe announced a big update to the Google Chrome Acrobat Extension. We now have basic editing capabilities for PDF’s. Some of the functionality you’re used to on Acrobat on a PC can now be completed on your Chromebook.
There’s a lot of waffle in the article so we’ll list the key features below but you can read the full article here if you wish.
Rotate, delete, or reorder PDF pages
You can also merge multiple PDF documents together. Or split a document into smaller documents.
Convert from PDF
Convert from PDF to a Word, Excel or Powerpoint document, webpage or a JPG.
Comments, markups and highlights
E-Signatures and Form Fields
No more printing, completing by hand then scanning back in.
Some of these features are free which means you can do these on your personal devices, others fall under the college’s Adobe subscription so as long as you sign in with your Barton Peveril account you’ll be able to use them.
If you haven’t got it already, you can add it from the Chrome Web Store.
This was announced on the Adobe Blog on October 12th.
Full instructions on Trelson can also be found in this presentation.
Note – The video below hasn’t been updated since Trelson was rebranded from ChromEx but the method remains the same. Just the colours and branding may differ.
How does a student take the exam?
A student just needs to select ChromEx in the bottom left of the Chromebook BEFORE logging in.
Then when they are asked to log in to the ChromEx platform, the just need to use their normal college Google credentials.
https://my.barton.ac.uk/digital/wp-content/uploads/sites/4/2021/03/Trelson.png332712Will Taylorhttps://my.barton.ac.uk/wp-content/uploads/2018/06/LOGO-BP-COLOUR-1030x273.jpgWill Taylor2021-03-12 14:10:292023-01-25 08:59:16Trelson for Staff
Students can use this presentation to see how they will complete an exam using ChromEx.
Staff can head to this link to learn how to create an exam.
https://my.barton.ac.uk/digital/wp-content/uploads/sites/4/2021/03/ChromEx.png332712Will Taylorhttps://my.barton.ac.uk/wp-content/uploads/2018/06/LOGO-BP-COLOUR-1030x273.jpgWill Taylor2021-03-12 13:53:072021-05-20 08:15:43ChromEx – Exams on a Chromebook
they’re small and light, and these days they have some pretty spacious amounts of storage on them. We’ve seen the numbers of students and staff using USB sticks for college work jump ever higher in recent years. We use them too, just not for important stuff. Read on to find out why.
00Will Taylorhttps://my.barton.ac.uk/wp-content/uploads/2018/06/LOGO-BP-COLOUR-1030x273.jpgWill Taylor2015-05-05 15:24:482015-05-05 15:24:48Why You Shouldn’t Be Using USB Sticks