Put simply, KAMIis an online PDF annotation, markup and editor tool. You can highlight, underline, and strikethrough text in PDF and other document formats. You can also add text boxes, shapes, and images.
Kami also works with Google Drive and Google Classroom. With Kami, you can easily collaborate on documents in the classroom while avoiding the hassles of printing documents.
The feature we love the most is the ability to mark your whole class work in one go with the Classroom integration.
A couple of days ago Adobe announced a big update to the Google Chrome Acrobat Extension. We now have basic editing capabilities for PDF’s. Some of the functionality you’re used to on Acrobat on a PC can now be completed on your Chromebook.
There’s a lot of waffle in the article so we’ll list the key features below but you can read the full article here if you wish.
Rotate, delete, or reorder PDF pages
You can also merge multiple PDF documents together. Or split a document into smaller documents.
Convert from PDF
Convert from PDF to a Word, Excel or Powerpoint document, webpage or a JPG.
Comments, markups and highlights
E-Signatures and Form Fields
No more printing, completing by hand then scanning back in.
Some of these features are free which means you can do these on your personal devices, others fall under the college’s Adobe subscription so as long as you sign in with your Barton Peveril account you’ll be able to use them.
If you haven’t got it already, you can add it from the Chrome Web Store.
This was announced on the Adobe Blog on October 12th.
Noted is a fully-integrated audio recording and note-taking app.
What does that mean though?
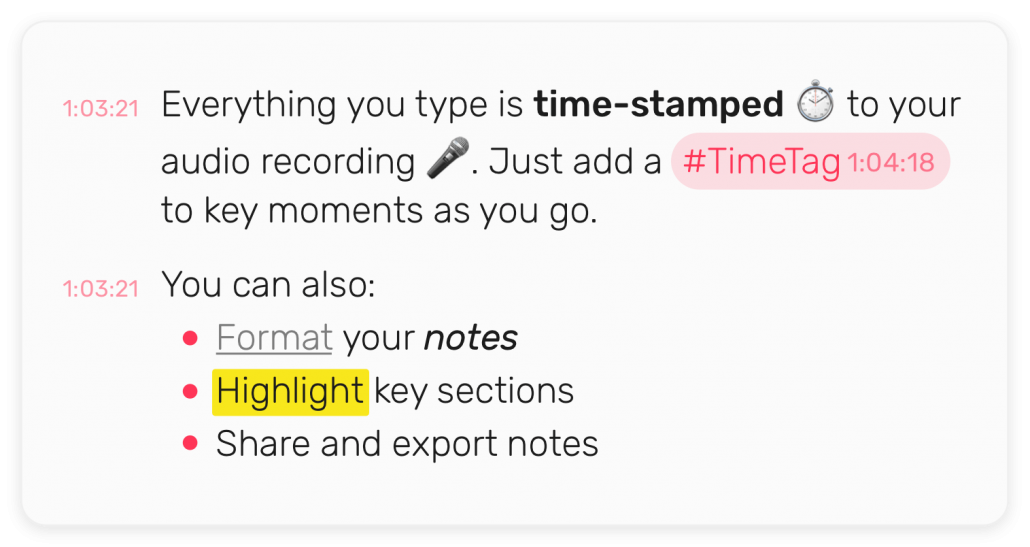
Noted allows you to type out notes as well as recording audio clips to link with your notes meaning it’s easier to keep everything neat, tidy and together. If, for example, you record a whole lecture or class talk, everything you type is time-stamped so you know what point of the audio clip was happening as you typed. You can also add a little #TimeTag on specific points so you can easily jump back and forth between key pieces of information you want to make sure you don’t forget. Then you can also link specific pieces of text to those #TimeTags to join written notes and audio notes together more.
It means you’re boosting your productivity by having all your notes in one place and with audio notes you get to keep the context of what you’re trying to note. You don’t have to miss anything anymore.
All this is completely free!
Noted only works with Apple products, but it does that seamlessly across Mac, iPhone, iPad and Apple Watch so you can just record a quick note on your Watch and it will automatically be synced to your Mac for when you need it. The same with your phone, if you’re out and about just open your phone and record a quick message or type a quick note and you’ll be able to get it on your Mac almost instantly.
There is also a Noted+ extra subscription if you like it enough. This extra includes dictation so you can turn your spoken words into written notes, it includes improved quality, background noise reduction and better exporting tools among other things. The best feature of Noted+ is that it includes Intelligent Playback so with that turned on, when it’s playing your notes back to you it will automatically skip and silence or background noise and only play you the important bits. Noted+ is $24 a year, roughly £17, at the time of writing.
Keybr is another app to help you learn how to touch type or to just improve your typing speed. Learning this now will help you in later life, it improves your efficiency when taking notes or completing normal work tasks.
The great thing about Keybr is that once you’ve started typing and gone through a game or two, it will pull all this information about how you type into a report for you to understand. It can tell you where you stand in the average typing speed of everyone who uses the app, what letters you miss the most and more.
On the reports after a couple of minutes of typing, I learned that I am in the top 3% of all users on the site, am slowest going to the I key and hit the E key wrong the most times. It’s easy to also keep track of how many days and how long you’ve been practising too with stats just for that one day and a comparison across your all time statistics.
To get started you need to create an account so it can save your progress. Once you’ve done that, head to the Settings and change the Keyboard Layout to English UK as the default is US.
You can even play a little multiplayer game against others around the world. It gives you a paragraph to type out and the fastest wins!
Do you often stay up late scrolling your phone? Hit the snooze button too much? If you have trouble putting your phone down at night, or suffer from insomnia and want to attain a healthy, regular sleep schedule. SleepTown is your best solution.
It’s made by the same team who made Forest, one of our recommended focus apps so you can pair the two together and really focus your time and energy on things other than your phone.
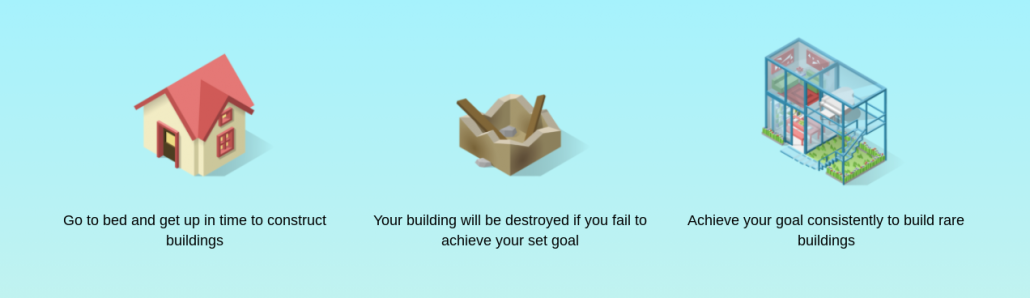
How it works: 3 steps to a healthy sleep schedule
Set your own challenging bedtime and wake-up goal.
Open the SleepTown app before your bedtime goal and start constructing a building.
Wake up before your wake-up goal, shake your phone to clear your mind, and see which building you got. Every morning the building is a surprise that will motivate you to wake up!
SleepTown Can Help You:
Beat your phone addiction and get more sleep
Maintain regular sleep hours between 4-10 hours a day
Construct amazing buildings by achieving your bedtime and wake-up goals
Wake up to a reward every day – your new building!
View your “SleepTown” and all your sleep statistics in the town page
Night shift mode helps reduce blue light
Head to this link to take a look at a video of how it works.
TypingClub is an effective way to learn how to touch type for free! In this modern world, touch typing is an invaluable tool, for a lot of jobs typing quick is key to being efficient. It can also help in your education by allowing you to type your notes quicker when in a lecture.
Although the graphics and games seem to be aimed at a slightly younger audience, it’s free and makes it easy to learn how to touch type in your web browser, you can just log in and get started straight away. Anyone can do it.
There are 678 different lessons, starting from simple tests with a couple of keys to running through a whole paragraph with minimal mistakes.
But if you don’t want to start right at the beginning, there is a Placement Test that works out how well you can type at the moment and jumps you forward to a point in their program so you’re not wasting time on things you already do. When I took this test, it took about 5 minutes and bumped me up from lesson 1 to lesson 316 so I’m almost halfway through the test already.
If you create an account on the TypingClub website you can keep an eye on your stats and monitor your progress towards becoming a fluent touch typist.
I ran through the final test while I was writing this post. I managed to get 98% accuracy, high score of 3665 and 4 out of 5 stars. If you want to give it a go, make sure you are sat at a computer then head to this link.
Get Revising is filled with smart revision tools and tips to help boost your grades. As part of The Student Room, you can be sure it’s got a good team behind it and a trusted name.
It’s filled with past papers and quick quizzes to help you learn more about whatever subject you need, all in all there are over 300,000 different learning resources with 192,564 resources just for A Level subjects (At the time of writing). Just over 140,000 of those resources are for GCSE subjects so if you’re retaking any of your GCSE subjects or want to help your friend or family member taking theirs, there’s enough resources to help everyone.
You can even search by exam board to make sure the information you use is relevant to your exact subject and exam.
It’s free for everyone, and teachers are regularly adding more and more quizzes and mindmaps all the time. Just a quick example, there are over 1,000 Spanish resources, 6,000 Law resources, and over 20,000 Biology resources.
If you want to be confident in the information you’re looking at, each resource has a rating system and some have Teacher Recommendations. Take a look at the example below, Art in Roman Britain has a 5 star rating meaning it is useful for A Level Classical Civilization, it also has a Teacher Recommendation which means a teacher has looked through the resource and found that it is of high quality.
A great feature of Get Revising is their revision resource creation tool! These tools have been designed to make it easy for you to create something to test your knowledge, re-use it so you learn it best and share with others to help them too. Just look at all the tools available to you below:
Coggle is an online tool for creating and sharing mind maps and flowcharts. It works online in your browser so there’s nothing you need to install or download! Whether you’re taking notes, brainstorming, planning, or doing something creative. It’s simple to visualise your ideas and build a plan with Coggle. Share with friends, classmates or no one as you like. Changes are saved instantly so no worry about having to make sure you save it before closing.
You can create a mind map or flowchart for loads of different things, probably things you’ve never even thought of! From learning how to manage your stress in a way that’s unique to you, to creating diagrams to help you revise for your assessments. Check out these example boards below:
You can add floating text and images to your diagrams meaning you can annotate your map for clarity, you can create loops and join branches from multiple starting points for your different ideas and paths.
With the free version of Coggle you get access to all the features we mentioned above, as well as unlimited image uploads, access to over 1600 icons, a full change history and PDF & Image download. The free version allows you to create 3 private diagram boards, once you’ve used the 3 private ones then all others you create will be public so anyone may be able to look at it if they know how to find it.
Lexico.com is a new collaboration between Dictionary.com and Oxford University Press (OUP) to help users worldwide with everyday language challenges. Lexico is powered by Oxford’s free English and Spanish dictionaries and features multi-language dictionary, thesaurus, and translation content.
As it’s powered by Oxford, the world language data experts, you can be sure you’re getting the most accurate and consise information.
You can find the correct spelling, useage and history of words and phrases. For example, rhinoceros come’s from Middle English, via Latin from the Greek meaning ‘nose horn’. You can also find out about the word of the year and a new word of the day each day.
The complete list of features at the time of writing is below:
English Dictionary
US Dictionary
Spanish Dictionary
English – Spanish Translator
Synonyms
Spelling Tips
Punctuation Tips
Writing Tips
Usage
Word Origins
Language Questions
Word Lists
The extensive blog and articles are filled with tips and informative posts about the varities of words we use and how to use them right.