Mote lets you record a quick comment in Google Docs. It’s tagline is; the faster, friendlier way to comment on docs.
The mote Chrome extension makes it easy to add voice note feedback for students within Google Docs, Google Classroom, Slides and Sheets. You can quickly add a comment in simple terms without having to worry about how it may come across in the written word.
mote’s mission is to make document collaboration faster, friendlier and more powerful.
Lexico.com is a new collaboration between Dictionary.com and Oxford University Press (OUP) to help users worldwide with everyday language challenges. Lexico is powered by Oxford’s free English and Spanish dictionaries and features multi-language dictionary, thesaurus, and translation content.
As it’s powered by Oxford, the world language data experts, you can be sure you’re getting the most accurate and consise information.
You can find the correct spelling, useage and history of words and phrases. For example, rhinoceros come’s from Middle English, via Latin from the Greek meaning ‘nose horn’. You can also find out about the word of the year and a new word of the day each day.
The complete list of features at the time of writing is below:
English Dictionary
US Dictionary
Spanish Dictionary
English – Spanish Translator
Synonyms
Spelling Tips
Punctuation Tips
Writing Tips
Usage
Word Origins
Language Questions
Word Lists
The extensive blog and articles are filled with tips and informative posts about the varities of words we use and how to use them right.
Artstor provides a complete image resource in a wide array of subjects with the breadth and depth to add context beyond the confines of your discipline. With approximately 300 collections composed of over 2.5 million images (and growing), scholars can examine wide-ranging material such as Native American art from the Smithsonian, treasures from the Louvre, and panoramic, 360-degree views of the Hagia Sophia in a single, easy-to-use resource. Artstor also supports study across disciplines, including anthropology from Harvard’s Peabody Museum, archaeology from Erich Lessing Culture and Fine Art Archives, and modern history from Magnum Photos, making it a resource for your whole institution.
Portland Press is suspending paywalls on all content published across the Biochemical Society’s seven journals until further notice. This means access to articles will be freely available to all, whether working remotely or in a laboratory, across the globe. This range of research and review journals includes these titles:
Biochemical Journal – a leading bioscience journal publishing high-impact scientific research papers and reviews in the fields of biochemistry, cellular biosciences and molecular biology.
Translating molecular bioscience and experimental research into medical insights, Clinical Science offers multi-disciplinary coverage and clinical perspectives to advance human health.
Bioscience Reports provides a home for sound scientific research in all areas of cell biology and molecular life sciences.
Publishing high-quality molecular and cellular neuroscience research, Neuronal Signaling spans a variety of neuroscientific disciplines, from signaling pathways involved in nervous system development through to neurodegeneration, synaptopathies, psychiatric disorders and other pathologies.
Biochemical Society Transactions is the reviews journal of the Biochemical Society. Publishing concise reviews written by experts in the field, providing a timely snapshot of the latest developments across all areas of the molecular and cellular biosciences.
Essays in Biochemistry publishes short, digestible reviews from experts highlighting recent key topics in biochemistry and the molecular biosciences. Written to be accessible for those not yet immersed in the subject, each article is an up-to-date, self-contained summary of the topic.
Reflecting the interdisciplinary nature of life science research, Emerging Topics in Life Sciences is a journal jointly-owned by the Royal Society of Biology and the Biochemical Society specializing in publishing themed issues on emerging topics.
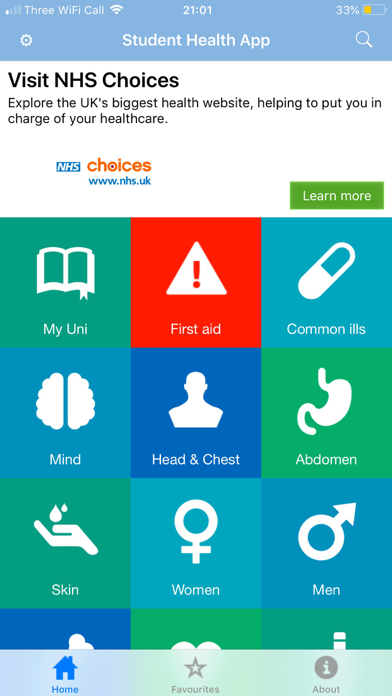
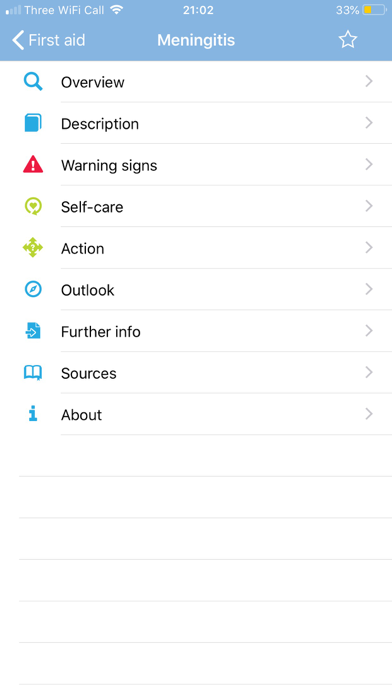
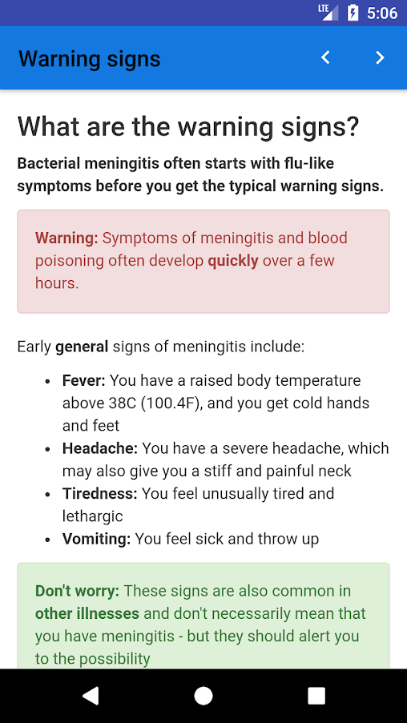
approved by the Organisation for the Review of Care and Health Applications (ORCHA) – read the review here
There’s no need to sign up, and the app does not collect any personal user data (similar to an e-book). The app also doesn’t contain any advertising.
In partnership with the University of Bristol Students’ Health Service, the app has been co-created by medical doctors and students and is certified by the NHS England Information Standard as a source of clear, reliable and relevant health information.
https://my.barton.ac.uk/digital/wp-content/uploads/sites/4/2020/04/StudentHealthMatters.png332712Will Taylorhttps://my.barton.ac.uk/wp-content/uploads/2018/06/LOGO-BP-COLOUR-1030x273.jpgWill Taylor2020-04-09 10:12:362020-04-09 10:12:38Student Health
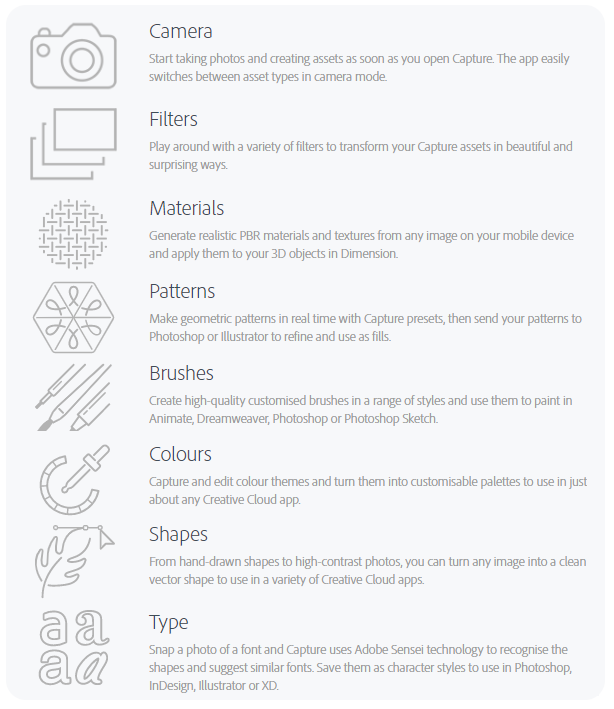
Adobe Capture is a fantastic app that enables you to find fonts and colours or create a vector simply by taking a photo.
Use your mobile device as a vector converter to turn photos into colour themes, patterns, type, materials, brushes and shapes. Then bring those assets into your favourite desktop and mobile apps — including Adobe Photoshop, Illustrator, Dimension, XD and Photoshop Sketch — to use in all your creative projects. FAD have a quick run through on Capture that you can see here.
Identify Typography
Find your perfect font using Adobe Capture. Take a photo of the type you like (in a magazine, on a label, a sign, anywhere!) and watch a list of similar Adobe Fonts magically appear.
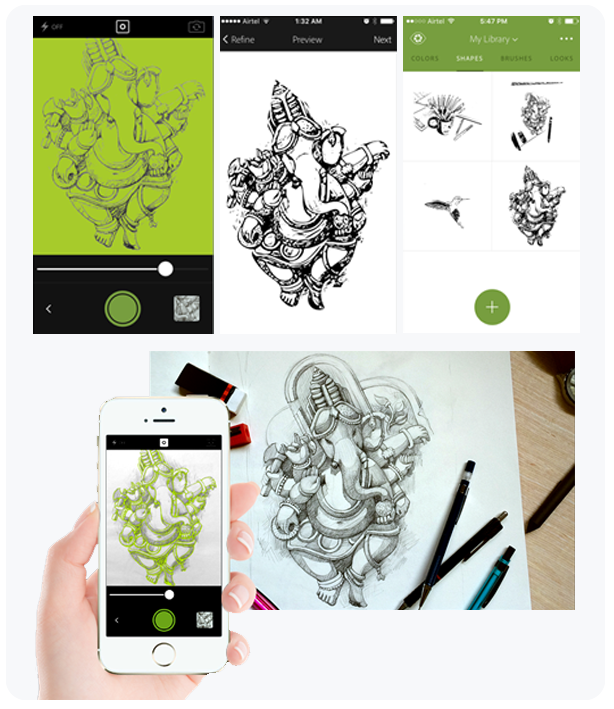
Vectorize on the Go
Create vectors instantly with Shapes. Turn images into smooth, scalable vectors with 1-32 colors, for use in logos, illustration, animation, and more. Point and shoot at your drawing or upload a photo and watch it transform into clean, crisp lines.
Create Color Themes/Gradients
Designers, rejoice! Looking for customized color palettes? Find an inspiring gradient? Aim your camera at the scene that has the colors you want and capture them to use in your artwork.
Craft Intricate Patterns
Capture inspiring images and generate patterns with Capture preset geometrics. Easily create beautiful, colorful patterns that fit with your creative projects by using your vector shapes with our precision pattern builder.
Build Beautiful Digital Brushes
Can’t find the right brush? Take a photo or use an image to create digital brushes that match your creative vision. Use your brushes in Photoshop or Illustrator for rich painterly effects.
Generate 3D Textures
Generate realistic PBR materials for use in 3D design straight from the camera. Modify your materials for even more texture or blend the edges for seamless repeat tiling on your 3D objects.
Capture Light and Color
Collect light and hue to turn into beautiful color grading profiles for your images and videos with Looks. Record the magic of a sunset and transfer that feel to use in your photos and video projects.
Seamlessly Sync Creative Elements
All your assets save to Adobe Creative Cloud libraries. Instantly access your digital elements from your Creative Cloud account in all compatible applications.
Blogger is Google’s free blogging service, probably the most famous blog service in the world. Whether you’d like to share your knowledge, experiences or the latest news, create a unique and beautiful blog for free.
It’s so simple to get started with Blogger, follow the steps below to start your first blog. Before you do get started though, it’s worth noting that Blogger will only work in Chrome, Firefox, Opera or Safari browsers so if you’re using Internet Explorer or Microsoft Edge, you’ll need to get yourself one of the other browsers listed here. Also, your blog can either be Public for anyone in the world to see or Private where you can limit it to a maximum of 100 people to view it. If you want more than 100 people to be able to view it but don’t want it to be public to the world, it might be best creating a Google Site and adapting it into a blog instead.
If you are creating a blog for a personal reason, it might be best to create it using a personal Google account as you may lose access to your blog when you leave Barton.
This can be anything you want it to be, as long as no one has used that same URL before.
Choose a template.
Click Create blog.
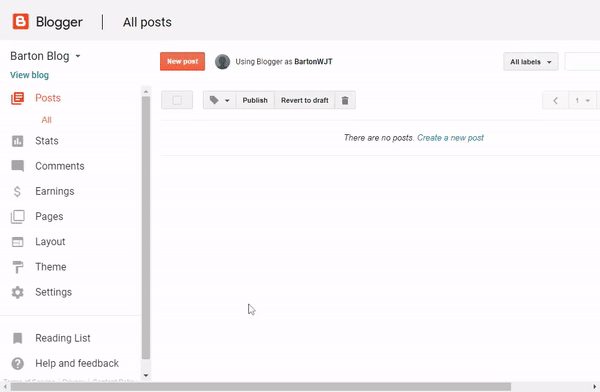
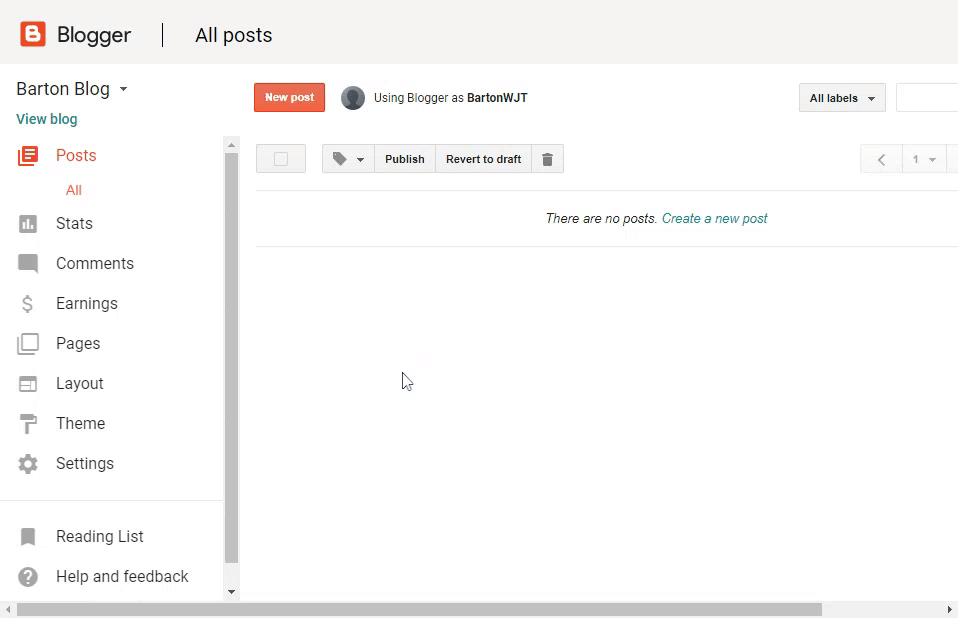
That’s your blog created and ready for content!
Blog Theme
A plain blog might look a bit boring, there are a couple of ways you can change the design of your blog to make it look a bit better. Blogger provides a range of pre-made template themes for you to choose from. Follow the steps below to take a look:
In the left menu, click Theme.
Click the theme you want to use.
Just below the theme, click Apply to Blog.
Now you’ve picked the theme, you can customize it further by simply selecting the Customize option at the top of the page. From here you can change the background, colours, sizings and all sorts of settings. Once happy, click Apply to Blog in the top right corner, to make your changes live. Click Back to Blogger to go back to the homepage.
Layout & Gadgets
The layout of your blog might be something you want to change once you’ve got a bit more content on your blog, it can be hard to decide on a layout before you start adding content.
Gadgets are extra little bits to add to your blog, you can add lists, individual images, links to Wikipedia articles and more!
To start with both Layouts & Gadgets, just click the Layout menu on the left hand side.
In here you can move the different areas around and find a layout that works best for you. To add a gadget to a certain location click the Add Gadget button and then take a look through the list to find one you want.
Pages
You can add pages to keep information separate, such as an ‘About’ page or a ‘Contact’ page. There is no limit to the number of pages you can have on one blog. Before they will show on your Blog, you will need to add the Pages Gadget to allow users to navigate around the blog. Follow the steps below to add the Pages Gadget:
In the left menu, click Layout.
In the section you want your pages to show, click Add a Gadget.
In the window, next to “Pages”, click Add .
Set your settings and click Save.
At the top right, click Save arrangement.
Adding, editing or removing a page
In the left menu, click Pages.
Create a new page: Click New page. Enter a page title and other information and click Save, Preview, or Publish.
Edit a page: Under the page you want to edit, click Edit. Update your page and click Save, Preview, or Publish.
Delete a page: Under the page you want to remove, click Delete then Ok.
Link to external site
You can get a link on the Pages Gadget to link an external site, such as a YouTube channel or other website.
In the left menu, click Layout.
In the “Pages” section, click Edit .
Under “Pages to show,” click + Add external link.
Enter the page title and URL and click Save Link.
Select the pages to show
In the left menu, click Layout.
In the “Pages” section, click Edit .
Select the pages you wish to show.
Click Save.
At the top right, click Save arrangement.
Posts & Content
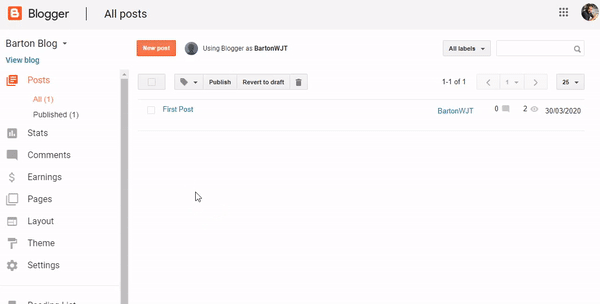
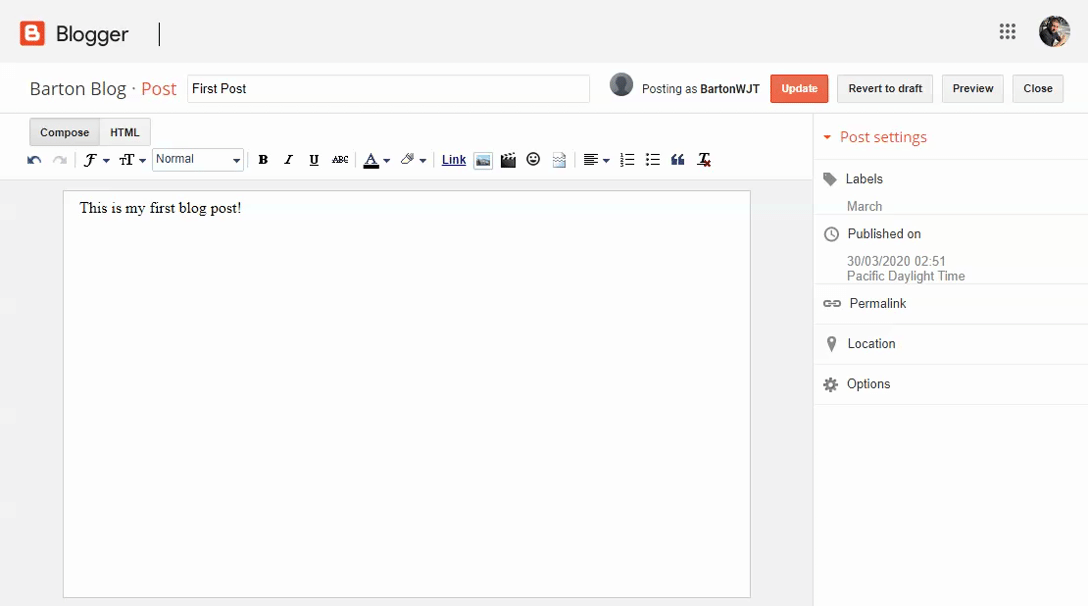
Write a new post
Click New Post.
Create the post.
Optional: To see how your post will look, click Preview.
To save your post without publishing it, click Save. To publish your post, click Publish.
Labels
Labels can help you organize your posts to make it easier to find posts of a similar subject. You can create a label for anything, such as a month or year or just any word.
You can add more than one label to a post.
In your dashboard, you can find your labels next to the title.
Your readers can find your labels in your posts and use them to filter your content.
Add labels to your posts (Optional)
To open the editor view, click an existing post or click New post.
Click the From YouTube tab to search YouTube for a video or paste a YouTube link in.
Access to your blog
You can control who can edit your blog, and who can read it. It’s worth noting that your blog can either be Public for anyone in the world to see or Private where you can limit it to a maximum of 100 people to view it. If you want more than 100 people to be able to view it but don’t want it to be public to the world, it might be best creating a Google Site and adapting it into a blog instead.
Let others edit your blog
In the left menu, click Settings Basic.
Under “Permissions,” find “Blog Authors” and click Add authors.
Enter the email address of the person you want to add.
Click Invite authors.
Who can see your blog
In the left menu, click Settings Basic.
Under “Permissions,” find “Blog Readers” and click Edit.
Select Public, Private – Only blog authors, or Private – Only these readers.
Click Save changes.
After they accept the invitation, they’ll be listed as an author. You can add up to 100 total members (authors, administrators, or readers) to your blog.
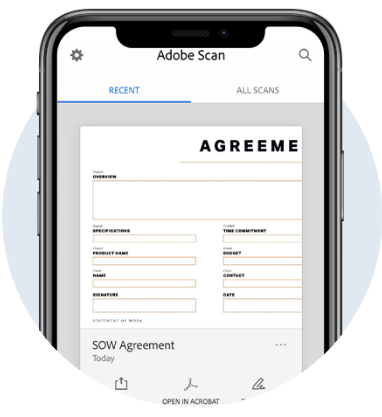
Adobe Scan is a mobile document scanner that can turn anything into an Adobe PDF.
With Adobe Scan, easily capture and convert documents, forms, business cards, and whiteboards into high-quality Adobe PDFs. And with different capture modes, you can ensure that you capture the clearest scan every time.
Fast and easy signatures and form filling.
Eliminate the hassle of finding a printer, filling a form by hand, and scanning it again. Use Adobe Scan to turn paper forms into interactive digital documents you can easily fill out, sign and share.
Intelligently cleaner and clearer scans.
Using Adobe Sensei, Adobes powerful AI, Adobe Scan identifies and sharpens handwritten or printed text, while removing elements you don’t want, like glare and shadow.
Share scans from anywhere.
Scans are stored in Adobe Document Cloud so they’re easy to access, share, or upload directly into emails.
Using Adobe Scan and Google Classroom
The video below will quide you through installing the app and uploading your first scan to Google Drive, which you’ll then be able to upload to Google Classroom.
We’ll take you through the steps below too:
Open the Adobe Scan app.
Press the Camera icon.
Place what you want to scan in view of your device camera.
Wait while the app detects the page and content, when it’s done that it will automatically take an image of it.
When the image has been taken, you can drag the borders around the page to more accurately outline a page.
Once happy with the image, press Continue.
Repeat steps 3-6 until you have scanned everything that you need to.
Press the small image of your last scan in the bottom right corner.
Scroll through the pages and make any visual adjustments you wish.
You can crop out unwanted bits, reorder the pages or change the coloring to make it easier to read. You can also use the Cleanup feature to remove unwanted blemishes in the image.
Once happy, press Save PDF.
The app will now prepare the final PDF for you.
Now to upload this to Google Drive.
On the screen with your PDF, press Share.
Press Share a Copy.
Locate and press Save to Drive or Google Drive.
Enter a name for the file, select which account to save it to and where to save it then press Save.
Now to add to Google Classroom.
Open the class you want to upload this to in Classroom.
Locate and open your assignment.
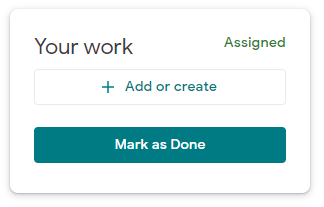
Click on Add or create.
Select Google Drive.
Locate and select your new PDF.
If you have just uploaded it, you should find it easily in the Recent tab.
Click Add.
Now, if that’s all you need to do for that assignment you can hand it in.
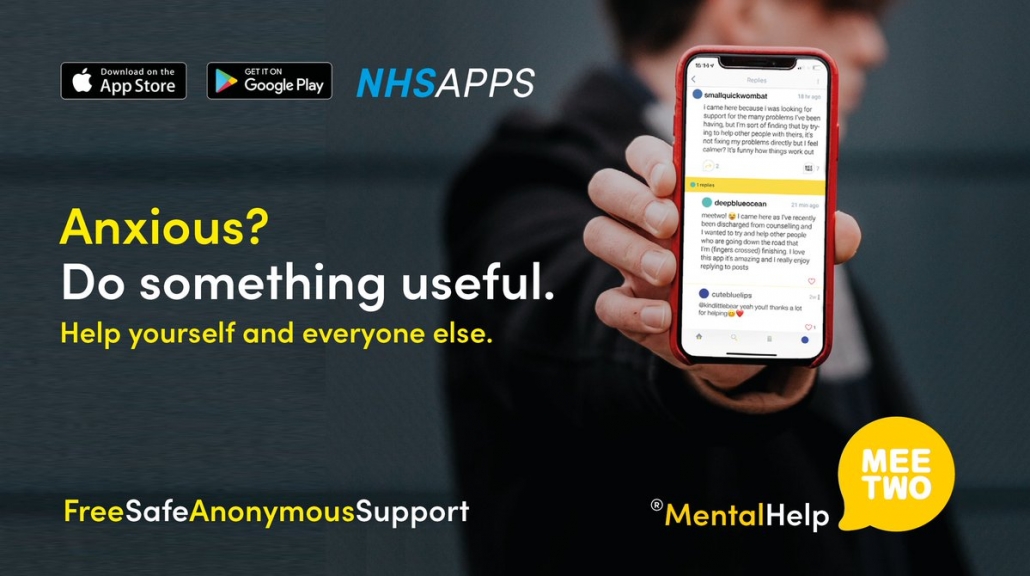
MeeTwo provides a safe and secure forum for teenagers wanting to discuss any issue affecting their lives.
If you’ve ever wanted to be able to ask difficult questions without the embarrassment that comes attached then Mee Two is the ideal solution. It’s recommended by the NHS in their Apps Library.
Mee Two is a completely free app available on the app store and google play that enables you to ask 100% anonymous questions and talk about difficult topics with people who have had similar experiences. Basically any question you would rather not ask out loud you can ask here.
All posts and their replies are checked so there is no chance of any bullying or harassment happening over your experiences.
MeeTwo has been designed by young people for young people. It has the support of experts and schools across the UK.
Please remember MeeTwo cannot provide medical or crisis support.