A couple of days ago Adobe announced a big update to the Google Chrome Acrobat Extension. We now have basic editing capabilities for PDF’s. Some of the functionality you’re used to on Acrobat on a PC can now be completed on your Chromebook.
There’s a lot of waffle in the article so we’ll list the key features below but you can read the full article here if you wish.
Rotate, delete, or reorder PDF pages
You can also merge multiple PDF documents together. Or split a document into smaller documents.
Convert from PDF
Convert from PDF to a Word, Excel or Powerpoint document, webpage or a JPG.
Comments, markups and highlights
E-Signatures and Form Fields
No more printing, completing by hand then scanning back in.
Some of these features are free which means you can do these on your personal devices, others fall under the college’s Adobe subscription so as long as you sign in with your Barton Peveril account you’ll be able to use them.
If you haven’t got it already, you can add it from the Chrome Web Store.
This was announced on the Adobe Blog on October 12th.
Noted is a fully-integrated audio recording and note-taking app.
What does that mean though?
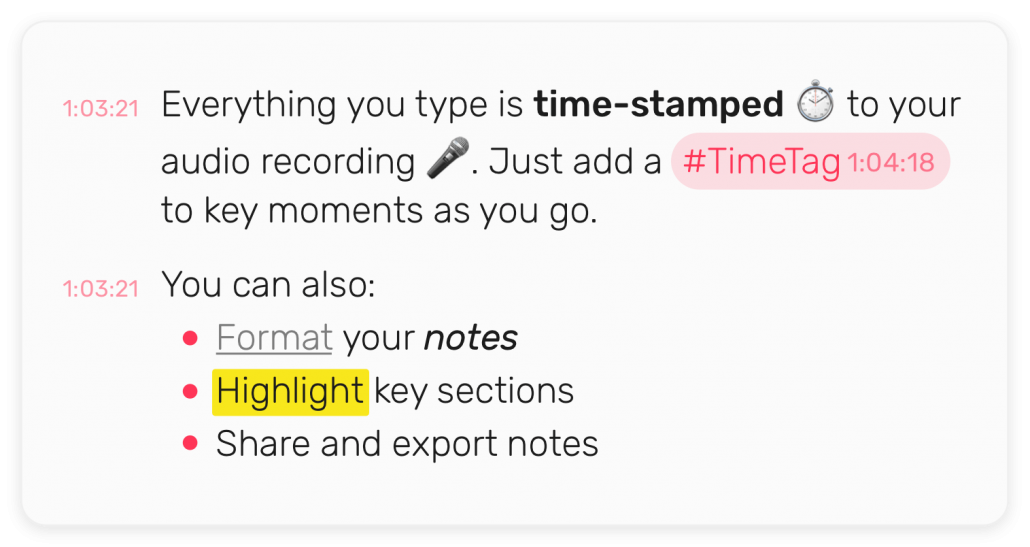
Noted allows you to type out notes as well as recording audio clips to link with your notes meaning it’s easier to keep everything neat, tidy and together. If, for example, you record a whole lecture or class talk, everything you type is time-stamped so you know what point of the audio clip was happening as you typed. You can also add a little #TimeTag on specific points so you can easily jump back and forth between key pieces of information you want to make sure you don’t forget. Then you can also link specific pieces of text to those #TimeTags to join written notes and audio notes together more.
It means you’re boosting your productivity by having all your notes in one place and with audio notes you get to keep the context of what you’re trying to note. You don’t have to miss anything anymore.
All this is completely free!
Noted only works with Apple products, but it does that seamlessly across Mac, iPhone, iPad and Apple Watch so you can just record a quick note on your Watch and it will automatically be synced to your Mac for when you need it. The same with your phone, if you’re out and about just open your phone and record a quick message or type a quick note and you’ll be able to get it on your Mac almost instantly.
There is also a Noted+ extra subscription if you like it enough. This extra includes dictation so you can turn your spoken words into written notes, it includes improved quality, background noise reduction and better exporting tools among other things. The best feature of Noted+ is that it includes Intelligent Playback so with that turned on, when it’s playing your notes back to you it will automatically skip and silence or background noise and only play you the important bits. Noted+ is $24 a year, roughly £17, at the time of writing.
Lexico.com is a new collaboration between Dictionary.com and Oxford University Press (OUP) to help users worldwide with everyday language challenges. Lexico is powered by Oxford’s free English and Spanish dictionaries and features multi-language dictionary, thesaurus, and translation content.
As it’s powered by Oxford, the world language data experts, you can be sure you’re getting the most accurate and consise information.
You can find the correct spelling, useage and history of words and phrases. For example, rhinoceros come’s from Middle English, via Latin from the Greek meaning ‘nose horn’. You can also find out about the word of the year and a new word of the day each day.
The complete list of features at the time of writing is below:
English Dictionary
US Dictionary
Spanish Dictionary
English – Spanish Translator
Synonyms
Spelling Tips
Punctuation Tips
Writing Tips
Usage
Word Origins
Language Questions
Word Lists
The extensive blog and articles are filled with tips and informative posts about the varities of words we use and how to use them right.
Students can use this presentation to see how they will complete an exam using ChromEx.
Staff can head to this link to learn how to create an exam.
https://my.barton.ac.uk/digital/wp-content/uploads/sites/4/2021/03/ChromEx.png332712Will Taylorhttps://my.barton.ac.uk/wp-content/uploads/2018/06/LOGO-BP-COLOUR-1030x273.jpgWill Taylor2021-03-12 13:53:072021-05-20 08:15:43ChromEx – Exams on a Chromebook
Speechnotes is an online Speech-to-Text notepad. For thinkers, bloggers, writers, drivers, joggers, busy people and anyone who prefers fast & easy typing.
Speechnotes is an online speech to text, designed to save time and to help turn your ideas into neat, clean notes.
Speechnotes uses the latest audio recognition technology to produce the best results in the shortest amount of time! With over 90% accuracy and one-click syncing to Google Drive, Speechnotes is perfect for your college work. It’s powered by Google’s Speech-to-Text engine and will autosave after every change, just like Google Docs.
For many of us, key-typing is slow and thus time-consuming. Speechnotes lets you type at the speed of speech (slow & clear speech).
Speechnotes lets you move from voice-typing (dictation) to key-typing seamlessly. This way, you can dictate when convenient and type when more appropriate. You can also dictate and edit your text results right away, and continue dictating. No need to go through app modes or even stop dictation.
Insert punctuation marks by speech (voice commands) or by a single click.
It works completely in your chrome browser and doesn’t require any downloads or installs to work although if you have an Android device you can get an app for your phone which includes a homepage widget to make it easier to start.
The video below from the team at Simpletivity is a great example of Speechnotes, skip forward to 1:15 to see it in action.
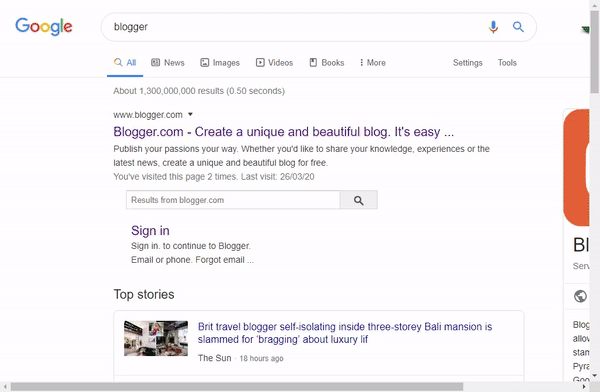
Blogger is Google’s free blogging service, probably the most famous blog service in the world. Whether you’d like to share your knowledge, experiences or the latest news, create a unique and beautiful blog for free.
It’s so simple to get started with Blogger, follow the steps below to start your first blog. Before you do get started though, it’s worth noting that Blogger will only work in Chrome, Firefox, Opera or Safari browsers so if you’re using Internet Explorer or Microsoft Edge, you’ll need to get yourself one of the other browsers listed here. Also, your blog can either be Public for anyone in the world to see or Private where you can limit it to a maximum of 100 people to view it. If you want more than 100 people to be able to view it but don’t want it to be public to the world, it might be best creating a Google Site and adapting it into a blog instead.
If you are creating a blog for a personal reason, it might be best to create it using a personal Google account as you may lose access to your blog when you leave Barton.
This can be anything you want it to be, as long as no one has used that same URL before.
Choose a template.
Click Create blog.
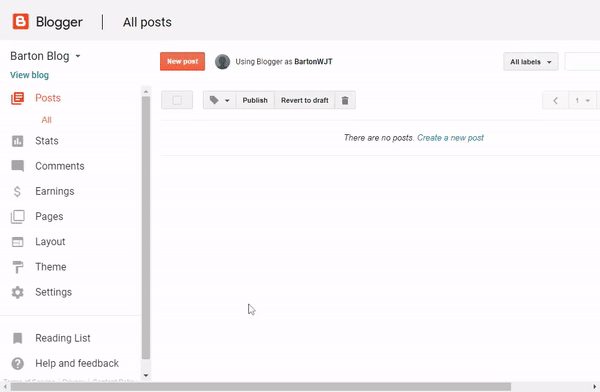
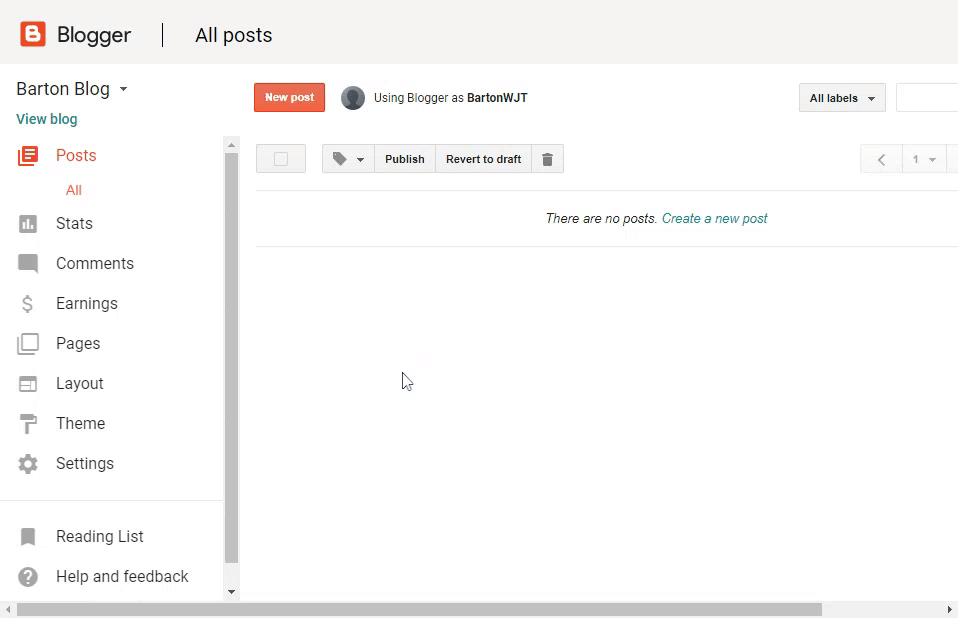
That’s your blog created and ready for content!
Blog Theme
A plain blog might look a bit boring, there are a couple of ways you can change the design of your blog to make it look a bit better. Blogger provides a range of pre-made template themes for you to choose from. Follow the steps below to take a look:
In the left menu, click Theme.
Click the theme you want to use.
Just below the theme, click Apply to Blog.
Now you’ve picked the theme, you can customize it further by simply selecting the Customize option at the top of the page. From here you can change the background, colours, sizings and all sorts of settings. Once happy, click Apply to Blog in the top right corner, to make your changes live. Click Back to Blogger to go back to the homepage.
Layout & Gadgets
The layout of your blog might be something you want to change once you’ve got a bit more content on your blog, it can be hard to decide on a layout before you start adding content.
Gadgets are extra little bits to add to your blog, you can add lists, individual images, links to Wikipedia articles and more!
To start with both Layouts & Gadgets, just click the Layout menu on the left hand side.
In here you can move the different areas around and find a layout that works best for you. To add a gadget to a certain location click the Add Gadget button and then take a look through the list to find one you want.
Pages
You can add pages to keep information separate, such as an ‘About’ page or a ‘Contact’ page. There is no limit to the number of pages you can have on one blog. Before they will show on your Blog, you will need to add the Pages Gadget to allow users to navigate around the blog. Follow the steps below to add the Pages Gadget:
In the left menu, click Layout.
In the section you want your pages to show, click Add a Gadget.
In the window, next to “Pages”, click Add .
Set your settings and click Save.
At the top right, click Save arrangement.
Adding, editing or removing a page
In the left menu, click Pages.
Create a new page: Click New page. Enter a page title and other information and click Save, Preview, or Publish.
Edit a page: Under the page you want to edit, click Edit. Update your page and click Save, Preview, or Publish.
Delete a page: Under the page you want to remove, click Delete then Ok.
Link to external site
You can get a link on the Pages Gadget to link an external site, such as a YouTube channel or other website.
In the left menu, click Layout.
In the “Pages” section, click Edit .
Under “Pages to show,” click + Add external link.
Enter the page title and URL and click Save Link.
Select the pages to show
In the left menu, click Layout.
In the “Pages” section, click Edit .
Select the pages you wish to show.
Click Save.
At the top right, click Save arrangement.
Posts & Content
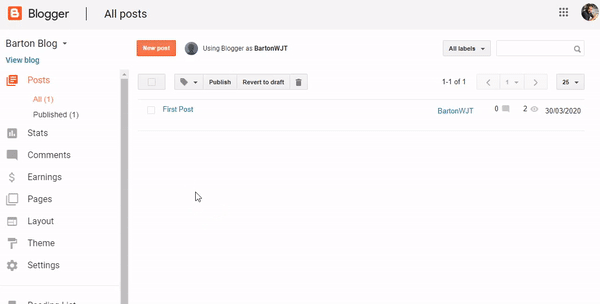
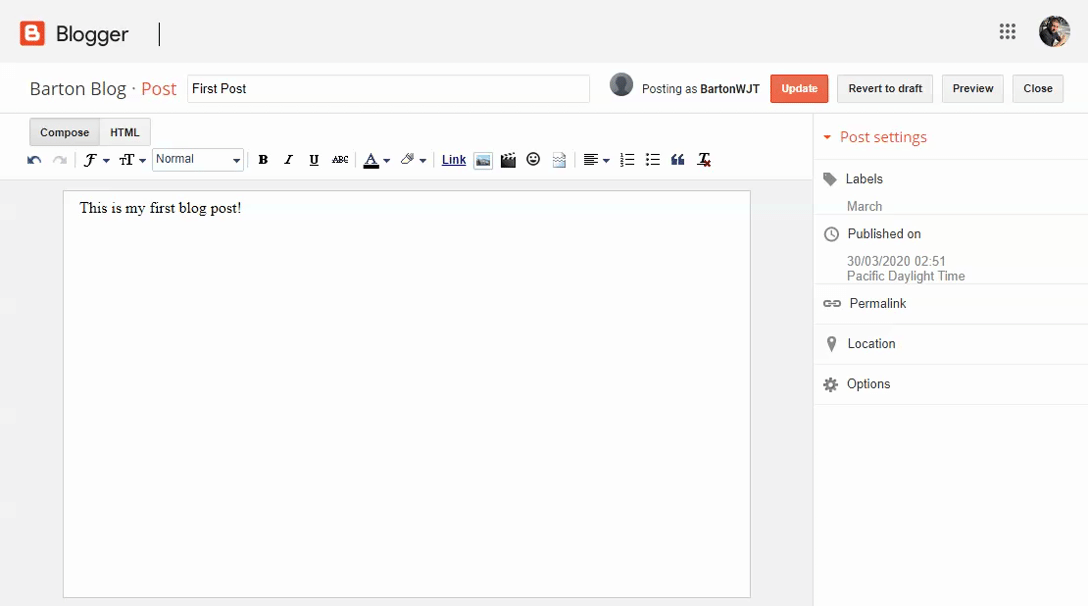
Write a new post
Click New Post.
Create the post.
Optional: To see how your post will look, click Preview.
To save your post without publishing it, click Save. To publish your post, click Publish.
Labels
Labels can help you organize your posts to make it easier to find posts of a similar subject. You can create a label for anything, such as a month or year or just any word.
You can add more than one label to a post.
In your dashboard, you can find your labels next to the title.
Your readers can find your labels in your posts and use them to filter your content.
Add labels to your posts (Optional)
To open the editor view, click an existing post or click New post.
Click the From YouTube tab to search YouTube for a video or paste a YouTube link in.
Access to your blog
You can control who can edit your blog, and who can read it. It’s worth noting that your blog can either be Public for anyone in the world to see or Private where you can limit it to a maximum of 100 people to view it. If you want more than 100 people to be able to view it but don’t want it to be public to the world, it might be best creating a Google Site and adapting it into a blog instead.
Let others edit your blog
In the left menu, click Settings Basic.
Under “Permissions,” find “Blog Authors” and click Add authors.
Enter the email address of the person you want to add.
Click Invite authors.
Who can see your blog
In the left menu, click Settings Basic.
Under “Permissions,” find “Blog Readers” and click Edit.
Select Public, Private – Only blog authors, or Private – Only these readers.
Click Save changes.
After they accept the invitation, they’ll be listed as an author. You can add up to 100 total members (authors, administrators, or readers) to your blog.
Journey allows you to keep a secret diary or a private journal of your life journey. Maybe you want to remember what you did on holiday, with a location and photo. Or maybe you want to just write your thoughts to get some headspace. Journey.Cloud is recommended by our Learning Support team.
If Journey sounds good to you, have a look at the short video below to see how it works.
G Suite for Education includes unlimited storage on Google Drive and access to Docs, Sheets, Slides, Forms, Classroom, Sites, Gmail and much more. You can access it using any browser on a desktop computer or mobile device. The beauty of G Suite is that it’s free to use, everything is saved online to Google’s servers and can be edited by multiple users simultaneously.
https://my.barton.ac.uk/digital/wp-content/uploads/sites/4/2019/05/GSuite.jpg332712Will Taylorhttps://my.barton.ac.uk/wp-content/uploads/2018/06/LOGO-BP-COLOUR-1030x273.jpgWill Taylor2019-05-17 11:54:562020-03-13 09:14:19G Suite for Education
MyBib is a simple citation tool that allows you to store references for future.
MyBibis a one-stop shop for all your citation needs. It’s clean, simple and very intuitive to use. It stands for My Bibliography.
While Cite This For Me is one of the best-known citation tools, I found MyBib so much easier to use, it comes with some nice extra features and it’s not covered in ads.