Blogger is Google’s free blogging service, probably the most famous blog service in the world. Whether you’d like to share your knowledge, experiences or the latest news, create a unique and beautiful blog for free.


It’s so simple to get started with Blogger, follow the steps below to start your first blog. Before you do get started though, it’s worth noting that Blogger will only work in Chrome, Firefox, Opera or Safari browsers so if you’re using Internet Explorer or Microsoft Edge, you’ll need to get yourself one of the other browsers listed here. Also, your blog can either be Public for anyone in the world to see or Private where you can limit it to a maximum of 100 people to view it. If you want more than 100 people to be able to view it but don’t want it to be public to the world, it might be best creating a Google Site and adapting it into a blog instead.

If you are creating a blog for a personal reason, it might be best to create it using a personal Google account as you may lose access to your blog when you leave Barton.

Creating your Blog

  1. Sign in using a Google account.
  2. On the left, click the Down arrow .
  3. Click New blog.
  4. Enter a name for your blog.
  5. Choose a blog address, or URL.
    • This can be anything you want it to be, as long as no one has used that same URL before. 
  6. Choose a template.
  7. Click Create blog.

That’s your blog created and ready for content!


Blog Theme

A plain blog might look a bit boring, there are a couple of ways you can change the design of your blog to make it look a bit better. Blogger provides a range of pre-made template themes for you to choose from. Follow the steps below to take a look:

  1. In the left menu, click Theme.
  2. Click the theme you want to use.
  3. Just below the theme, click Apply to Blog.

Now you’ve picked the theme, you can customize it further by simply selecting the Customize option at the top of the page. From here you can change the background, colours, sizings and all sorts of settings. Once happy, click Apply to Blog in the top right corner,  to make your changes live. Click Back to Blogger to go back to the homepage.

Layout & Gadgets

The layout of your blog might be something you want to change once you’ve got a bit more content on your blog, it can be hard to decide on a layout before you start adding content.

Gadgets are extra little bits to add to your blog, you can add lists, individual images, links to Wikipedia articles and more! 

To start with both Layouts & Gadgets, just click the Layout menu on the left hand side.

In here you can move the different areas around and find a layout that works best for you. To add a gadget to a certain location click the Add Gadget button and then take a look through the list to find one you want.


Pages

You can add pages to keep information separate, such as an ‘About’ page or a ‘Contact’ page. There is no limit to the number of pages you can have on one blog. Before they will show on your Blog, you will need to add the Pages Gadget to allow users to navigate around the blog. Follow the steps below to add the Pages Gadget:

  1. In the left menu, click Layout.
  2. In the section you want your pages to show, click Add a Gadget.
  3. In the window, next to “Pages”, click Add .
  4. Set your settings and click Save.
  5. At the top right, click Save arrangement.

Adding, editing or removing a page

In the left menu, click Pages.

  1. Create a new page: Click New page. Enter a page title and other information and click Save, Preview, or Publish.
  2. Edit a page: Under the page you want to edit, click Edit. Update your page and click Save, Preview, or Publish.
  3. Delete a page: Under the page you want to remove, click Delete then Ok.

Link to external site

You can get a link on the Pages Gadget to link an external site, such as a YouTube channel or other website.

  1. In the left menu, click Layout.
  2. In the “Pages” section, click Edit .
  3. Under “Pages to show,” click + Add external link.
  4. Enter the page title and URL and click Save Link.

Select the pages to show

  1. In the left menu, click Layout.
  2. In the “Pages” section, click Edit .
  3. Select the pages you wish to show.
  4. Click Save.
  5. At the top right, click Save arrangement.

Posts & Content

Write a new post

  1. Click New Post.
  2. Create the post.
    • Optional: To see how your post will look, click Preview.
  3. To save your post without publishing it, click Save. To publish your post, click Publish.

Labels

Labels can help you organize your posts to make it easier to find posts of a similar subject. You can create a label for anything, such as a month or year or just any word.

  • You can add more than one label to a post.
  • In your dashboard, you can find your labels next to the title.
  • Your readers can find your labels in your posts and use them to filter your content.

Add labels to your posts (Optional)

  1. To open the editor view, click an existing post or click New post.
  2. On the right, click Labels.
  3. Enter a label or click an existing label.

Filter your posts by label

  1. In the upper right, click the label dropdown .
  2. Click a label.

Adding Images & Video to a post

Adding an image

  1. Create a new post or edit a post to add images.
  2. On the Post Editor, click Insert image .
  3. Choose where you’d like to upload the image from.
  4. Choose one or more images to upload.
  5. Click Add selected.
  6. When the image is in your post, click it to change the size, caption, or alignment on the page.
Stop images from opening in an overlay

By default, images on your blog will be opened in a large overlay, called a Lightbox. To prevent images from opening in the Lightbox:

  1. In the left menu, select Settings Posts, comments and sharing.
  2. Under “Posts,” find “Showcase images with Lightbox” and select No.

Adding a Video

  1. Create a new post or edit a post to add a video.
  2. On the Post Editor, click Insert a video .
  3. Choose the video you want to use.
    1. Click the From YouTube tab to search YouTube for a video or paste a YouTube link in.


Access to your blog

You can control who can edit your blog, and who can read it. It’s worth noting that your blog can either be Public for anyone in the world to see or Private where you can limit it to a maximum of 100 people to view it. If you want more than 100 people to be able to view it but don’t want it to be public to the world, it might be best creating a Google Site and adapting it into a blog instead.

Let others edit your blog
  1. In the left menu, click Settings Basic.
  2. Under “Permissions,” find “Blog Authors” and click Add authors.
  3. Enter the email address of the person you want to add.
  4. Click Invite authors.
Who can see your blog
  1. In the left menu, click Settings Basic.
  2. Under “Permissions,” find “Blog Readers” and click Edit.
  3. Select Public, Private – Only blog authors, or Private – Only these readers.
  4. Click Save changes.

After they accept the invitation, they’ll be listed as an author. You can add up to 100 total members (authors, administrators, or readers) to your blog.

Adobe Scan is a mobile document scanner that can turn anything into an Adobe PDF.


With Adobe Scan, easily capture and convert documents, forms, business cards, and whiteboards into high-quality Adobe PDFs. And with different capture modes, you can ensure that you capture the clearest scan every time.

Fast and easy signatures and form filling.

Eliminate the hassle of finding a printer, filling a form by hand, and scanning it again. Use Adobe Scan to turn paper forms into interactive digital documents you can easily fill out, sign and share.

Intelligently cleaner and clearer scans.

Using Adobe Sensei, Adobes powerful AI, Adobe Scan identifies and sharpens handwritten or printed text, while removing elements you don’t want, like glare and shadow.

Share scans from anywhere.

Scans are stored in Adobe Document Cloud so they’re easy to access, share, or upload directly into emails.


Using Adobe Scan and Google Classroom

The video below will quide you through installing the app and uploading your first scan to Google Drive, which you’ll then be able to upload to Google Classroom.

We’ll take you through the steps below too:

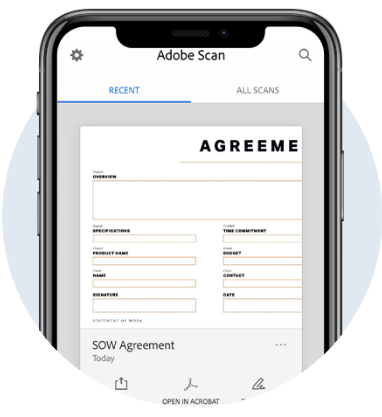
  1. Open the Adobe Scan app.
  2. Press the Camera icon.
  3. Place what you want to scan in view of your device camera.
  4. Wait while the app detects the page and content, when it’s done that it will automatically take an image of it.
  5. When the image has been taken, you can drag the borders around the page to more accurately outline a page.
  6. Once happy with the image, press Continue.
  7. Repeat steps 3-6 until you have scanned everything that you need to.
  8. Press the small image of your last scan in the bottom right corner.
  9. Scroll through the pages and make any visual adjustments you wish.
    1. You can crop out unwanted bits, reorder the pages or change the coloring to make it easier to read. You can also use the Cleanup feature to remove unwanted blemishes in the image.
  10. Once happy, press Save PDF.
  11. The app will now prepare the final PDF for you.

Now to upload this to Google Drive.

  1. On the screen with your PDF, press Share.
  2. Press Share a Copy.
  3. Locate and press Save to Drive or Google Drive.
  4. Enter a name for the file, select which account to save it to and where to save it then press Save.

Now to add to Google Classroom.

  1. Open the class you want to upload this to in Classroom.
  2. Locate and open your assignment.
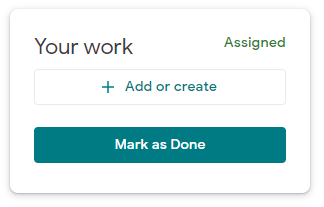
  3. Click on Add or create.
  4. Select Google Drive.
  5. Locate and select your new PDF.
    1. If you have just uploaded it, you should find it easily in the Recent tab.
  6. Click Add.
  7. Now, if that’s all you need to do for that assignment you can hand it in.

BBC iPlayer lets you watch BBC content from your computer, Smart TV or mobile device.


BBC iPlayer isn’t just for catching up on last night’s Eastenders or rewatching Gavin & Stacey for the 17th time, you can also find a lot of educational material in its depths. You can watch the latest episodes of QI to learn more quirky facts about the world or explore the hundreds of episodes of Science and Nature documentaries. There’s also great comedy and entertainment shows for when you have finished your work for the day and need to relax.

David Attenborough alone can take you through Climate Change for your Science lesson research, the different ecosystems around the world for your Geography research or even the early years of making nature documentaries for Media lesson research.

Some more examples of programmes that can aid your research are below:

Criminology – Jack the Ripper

Engineering – The Limit: Trickiest Tunnel

Music – Miles Davis: Birth of the Cool

Sport – Shane Williams: Rugby, Concussion and Me

Dance – The Royal Ballet: Mayerling

Don’t forget though that some episodes are only available for a limited time and can be removed from iPlayer at any time.

You can look through all the episodes and series available for each subject on the BBC iPlayer website or click one of these categories; History, Documentaries, Science & Nature, Music.

Scribbl is an online transcript creator for Google Meets. It’s simple to use, once you’ve signed, you just add Scribble as a member of the Meet session and it will automatically transcribe everything that is said in your Meet.

Their FAQ page has a tonne of information to help you see if this is right for you – https://www.scribbl.co/faq

It’s Easy

Step 1: Create a free Scribbl account
Step 2: Launch a Google Meet
Step 3: Copy/Paste Google Meet call in details into Scribbl Home Screen
Step 4: Click “Join Scribbl to Call”

Pricing

You get 240 minutes for free, that can be a number of small sessions or one big meet that you want transcribed. After you’ve hit 240 minutes you can purchase more minutes. It works out roughly 3p per minute but you need to purchase them in chunks of 120 minutes and upwards.

Google Meet is Google’s video conferencing tool that also allows you to share your screen with attendees.

Google Meet is Google’s video conferencing tool that enables you to to talk face to face and share your screen with others. Lesson content can be shared in a live video stream with groups ranging from a few people up to hundreds of users. You can use it on the web at meet.google.com, on your Android device and on iOS devices. You can either just jump straight into a Video Meeting or schedule one for a later date and time in Google Calendar.

One of the best features of Google Meet is its ability to provide live captions/subtitles which can be turned on by anyone who needs it.

We’ve written up a quick run through of Google Meet and how to get started below.

STUDENTS ARE ASKED TO FOLLOW THIS VIDEO CONFERENCING ETIQUETTE GUIDE TO ENSURE YOU CAN TEACH WITHOUT INTERRUPTION.


Google Meet Set Up

Starting a Starting & adding people

Follow the guide below on how to set a Google Meet instantly, how to add others whilst in the meet.

Scheduling a video meeting and inviting guests

Follow the guide below on how to set this up and how to invite guests ahead of time. You will need Google Calendar.

Setting up Google Meet in Google Classroom

Follow the guide on the left on how to set this up for students to join in Google Classroom


Joining a video meeting

Joining a video meeting can be done in a number of different ways depending on how it’s been set up. You can click the link in your calendar appointment, or your meeting text or email. You can type in the meeting code on the Google Meet site or join via a smartphone using the Google Meet App

Calendar Appointment
Email Link
Meeting Code
Mobile app

Change your computer’s Video & Audio settings

Meet will pick up your default camera, speaker and microphone which in most cases will be the only ones you have however if you plug in alternative devices to use instead, it should then automatically pick these up instead of any built-in device.

More information can be found here and steps for changing the settings within the mobile apps can be found here.


Sharing your screen

Sharing or ‘Presenting’ your screen is possible on computers and iOS devices but not currently supported on Android devices. On the computer you can opt to share your whole screen or just an individual window whereas on the iOS device you can only share your whole screen.

To present on your computer just look for the Present now button in the bottom right of the meeting window then select if you want to share a particular tab, your entire screen or a window. Sharing just a window will allow you to share just multiple tabs you have open if you have more than one presentation or document whilst allowing you to continue working on your computer.

More information including how to take over presenting from someone else can be found here.

Muting a class

If you wish to mute your class, you will need to click on the “People” icon. In the People settings you will see the “All Muted” option, click on this and a toggle option saying “Let everyone turn on their microphone” will come up. Toggling this will disable your students to turn their microphone back on. To let your students have their microphone back on, you will to toggle this back on so they can enable their microphone again.

More information including how to muting a class can be found here.

How to record and transcribe

To record in Google Meet, you require Google teaching license and the host of the Google Meet to be able to record. In the Google Meet. By clicking the 3 dots in the bottom task bar, you click on “Manage recording” then adjust the settings if you wish to transcribe the meeting or not. After click “Start Recording”. Once the meeting is finished, you can click “Stop recording” or end the call. The recording will automatically save into your Google Drive.

More information including how to record in Google Meet can be found here.

ThingLink allows you to seamlessly make any photo, video or 360 content into an interactive experience with text, links, sound, images, videos and calls to action.

You can narrate a 360 tour, make an infographic, create an interactive treasure map or just document your holiday. There are so many possibilities with ThingLink.

Want to learn more about ThingLink? Take a look at their slide-deck.

The example below I made quickly in 5 minutes, hover your mouse and click on the little information tags on the image. Scroll down to the bottom to see a 360 example from Nagh-Jahan Square in Iran,

Spiral is a quick way to carry out formative assessments in the classroom or during distance learning.


Engage students in lessons and at home with simple to use everyday learning activities.

Spiral Lite is the free version of Spiral, within this you get access to Google Classroom integration, the Spiral Dashboard and many more features including Quickfire Lite, a tool that allows you to ask a verbal question in the class or on a Meet and the student can respond from any device.


Launch an activity or post an assignment to be completed asynchronously

Students connect with the activity using a simple code on any device

Students answers appear live so they can learn from each other

Or you can review, grade and feedback assignments off-line

Free Features

  • In Class
    • Run live activities with students, review and grade them
  • Quickfire Lite
    • Live assessments
  • Dashboard
    • Build activities and assignments
  • Feedback and Grading
    • Realtime feedback
    • Build evidence of student learning
  • Timeline and Exit Tickets
    • Record of each class session
    • Record of each student’s learning
    • Share results with parents
  • Google Classroom Integration
    • Import class list
  • Student Dashboard
    • Students can see all assigned work
    • Can see grades

Quickfire Lite

Take a look at the video below to see about how you can use Quickfire Lite for classroom based or virtual teaching.

Save, organise and share content across the web with Wakelet.

This is a great tool that allows you to pool all of you research in to one location, called a Wake. You can save webpages, images, videos, tweets, articles, blog posts and more just by pasting the link in to Wakelet or by installing it’s browser extension and just clicking two buttons. Then you can share your wake with anyone in the world, or keep it private to you.

Take a look at some examples of Wakes below, these show you different formatting options and custom layouts.

The TED-Ed project — TED’s education initiative — makes short video lessons worth sharing, aimed at educators and students. Within TED-Ed’s growing library of lessons, you will find carefully curated educational videos, many of which are collaborations between educators and animators nominated through the TED-Ed platform.

Our very own Director of Humanities, Mark Robinson, has collaborated with TED-Ed to make range of videos:

Google Classroom is an online learning platform for schools and colleges that aims to simplify creating, distributing and marking assignments in a paperless way. Google Classroom is designed to help students and teachers communicate, collaborate, organise and manage assignments, go paperless, and much more! Classroom also seamlessly integrates with other Google tools like Google Docs and Drive.

Improved Communication – Teachers can create assignments, send announcements, and instantly start class discussions. Students can share resources with each other and interact in the class stream or by email. Teachers can also quickly see who has or hasn’t completed the work, and give direct, real-time feedback and grades.

Better Organisation – Students can see assignments on the To-do page, in the class stream, or on the class calendar. All class materials are automatically filed into Google Drive folders.

Read more