Powerpoint slideshows can vary hugely in size and that’s all down to the amount of pictures on the slides and the size of those pictures. Adding photos straight from a digital camera is one of the biggest examples of this. The amount and size of photos in a Powerpoint doc affects the following things:
- The speed at which you are able to edit your document
- The time it takes for Powerpoint to open your document
- The speed at which you can print the document
If you can’t compress the images before adding them into the document, luckily Microsoft included an easy compression tool within Powerpoint. On our testing, it took a 95MB slideshow down to 1.7MB, effectively reducing the size to roughly 1/100th of its original size. This will mean that printing, editing and uploading will be so much faster.
- To compress all the images in a Powerpoint, just follow these steps:
- Open the Powerpoint file and select a single image.
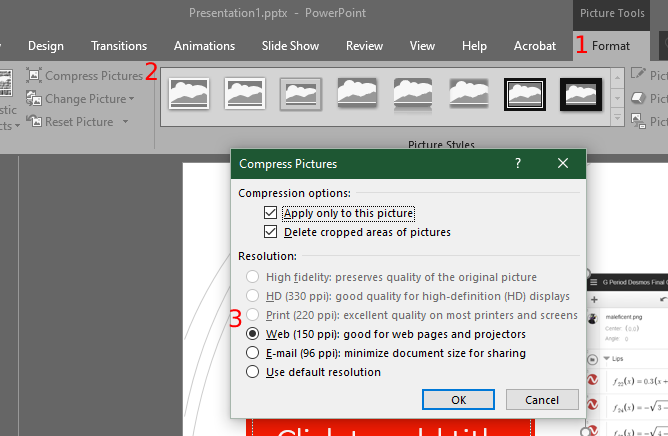
- Click the Format tab on the Ribbon at the top of the screen. (Image, step 1).
- Click Compress Images (Image, step 2) and UN-TICK the box that says ‘’Apply only to this image’’.
- We then suggest selecting either Web or Print. Click OK. (Image, step 3).
- Save the document.
- Done!
It’s as easy as that.